Connecting Voracity to Cloudera
This article, along with counterpart articles for HortonWorks (Ambari) and MapR, describes the simple 3-step process to connect the IRI Voracity big data management platform to a Cloudera distribution through the VGrid Gateway.
After connecting, data can be conveniently moved between HDFS and other systems. Furthermore, that data can be manipulated and transformed in Hadoop via MR2, Spark, Spark Stream, Storm or Tez using the jobs created in Voracity’s Eclipse IDE, IRI Workbench.
Step 1 – Collect Information from Cloudera Manager Dashboard
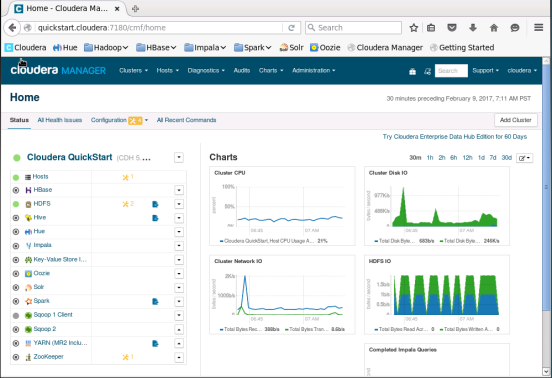
1. Log into Cloudera Manager.
2. Click HDFS. Then, click Configuration.
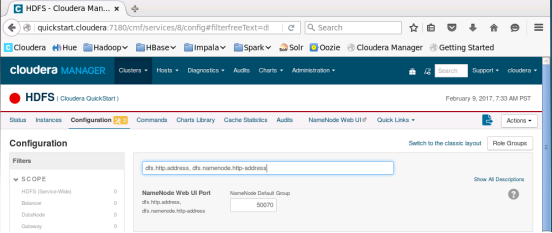
3. Make a note of the NameNode Web UI Port (dfs.http.address, dfs.namenode.http-address) value (in this case: 50070)
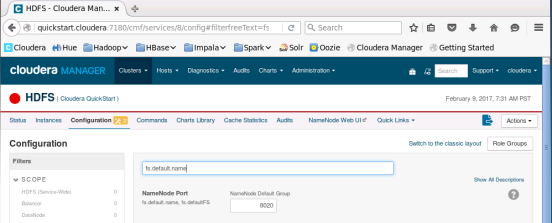
4. Make a note of the NameNode Port (fs.default.name) value (in this case: 8020)
5. Open Cloudera Manager and click YARN. Then, click Configuration.
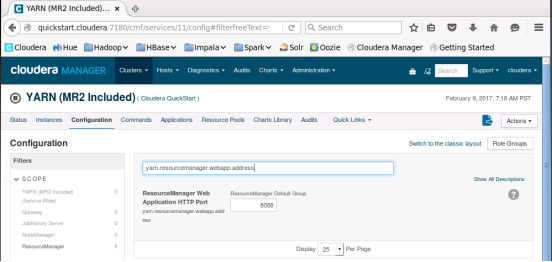
6. Make a note of the ResourceManager Web Application HTTP Port (yarn.resourcemanager.webapp.address) value (in this case: 8088)
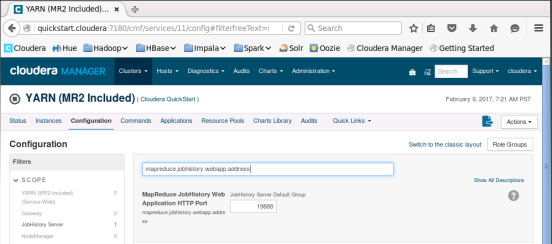
7. Make a note of the MapReduce JobHistory Web Application HTTP Port (mapreduce.jobhistory.webapp.address) value (in this case: 19888)
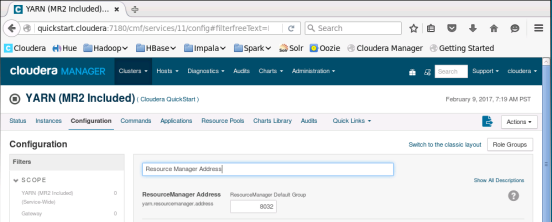
8. Make a note of the Resource Manager Address (yarn.resourcemanager.address) value (in this case: 8032)
9. Go back to the main Cloudera Manager screen and click on Oozie. Then, click Configuration.
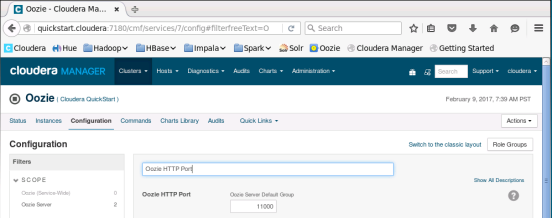
10. Make a note of the Oozie HTTP Port value (in this case: 11000)
Step 2- Enter configuration details in VGrid Dashboard
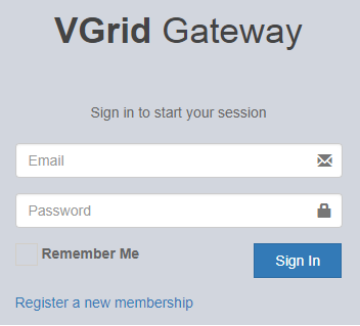
1. Log into the VGrid Gateway.
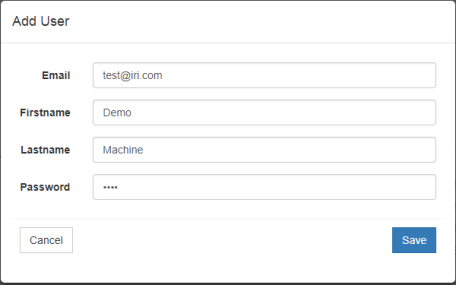
2. Click User > Add User and enter the user information.
3. Click the X in the success banner to refresh the screen.
4. Click Detail in the Action section of the new user.
5. Make note of the generated API key shown. It will be needed in the VGrid Gateway setup in the Workbench preferences screen.
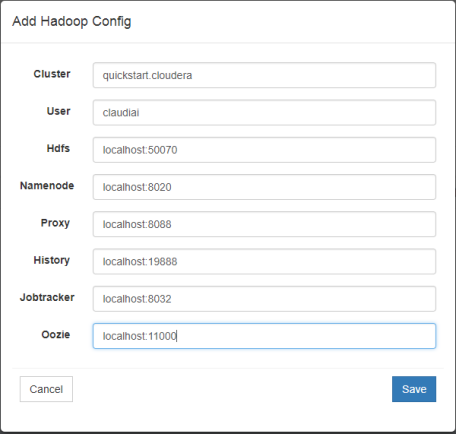
6. Click HadoopConfig and Add Hadoop Config.
- Cluster = Cluster Name
- User = User name that will be used as the user in the Hadoop file system when working in Workbench
- Hdfs = NameNode Web UI Port
- Namenode = NameNode Port
- Proxy = Resource Manager Web Application HTTP Port
- History = MapReduce JobHistory Web Application HTTP Port
- Jobtracker = Resource Manager Address
- Oozie = Oozie HTTP Port
7. Click the X in the success banner to refresh the screen.
8. Click HadoopConfig and click inactive to activate that configuration.
9. Multiple configurations can be associated with each user; however, only one can be active at any given time.
Step 3 – Enter configuration details in IRI Workbench
1. Open IRI Workbench. On the IRI > VGrid Gateway preferences screen, enter the details of the connection.
2. Click Test Connection to confirm that a successful connection is made. Included engines can be narrowed down here if only certain engines are being used in the Hadoop environment. Also, a default engine can be selected for Hadoop run configurations.
Once connected, you should be able to interact with HDFS and run compatible Voracity jobs seamlessly per this article. If you have any questions or need assistance, contact voracity@iri.com.

