Cassandra Data Masking
Editors Note / UPDATE: The article below describes an older method of data masking in Cassandra through IRI FieldShield. As of 2023 however, the DarkShield V5 features a purpose-built NoSQL DB API for searching and masking operations in Cassandra, as well as fit-for-purpose graphical wizard in the IRI Workbench GUI for DarkShield that leverages the API for PII protection in Cassandra. This video also demonstrates its use.
Cassandra security best practices indicates the anonymization of personally identifiable information (PII). In this article, we will show how to export data from a Cassandra database to a CSV file, and use the IRI FieldShield product (also available in the IRI Voracity platform) to randomize, mask, and encrypt the data in that CSV file. Then we will import that data back into Cassandra, updated and protected.
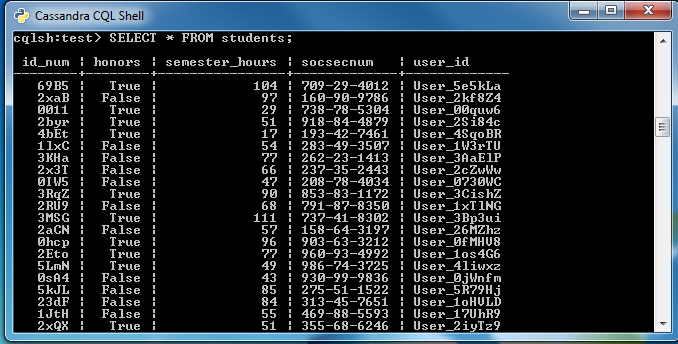
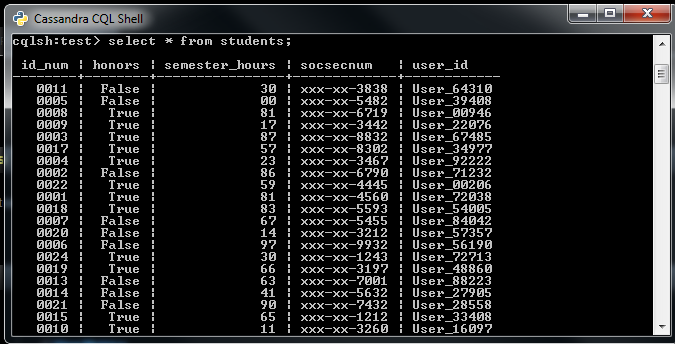
In our example we have a table with student information in DataStax. The columns are: id_num (the primary key), honors, semester_hours, socsecnum (social security number), and user_id.
To de-identify each student, we will randomize their semester_hours, mask their socsecnum, and encrypt the user_id value so that each student’s PII is protected.
Unprotected data in Cassandra
For our command line examples, we are using the DataStax Cassandra CQL shell.
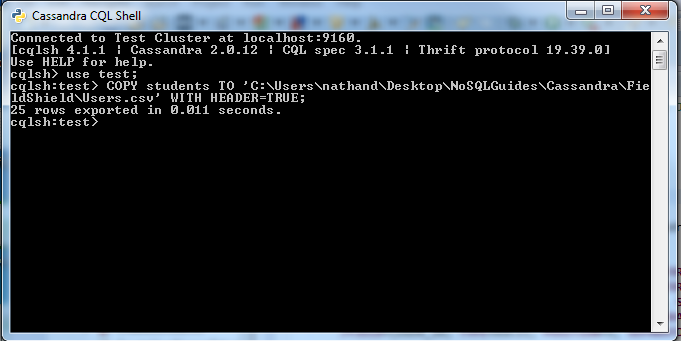
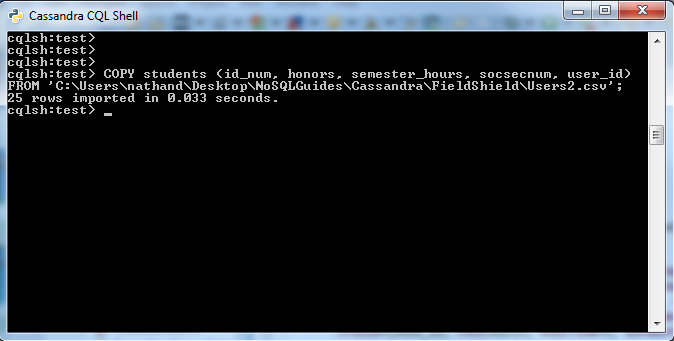
Exporting a Cassandra table to a CSV file
To export a Cassandra table to a CSV file, run the following command from the Cassandra CQL shell:
COPY <Exporting Table> TO '<File Path to the CSV you exporting to>' WITH HEADER=TRUE;
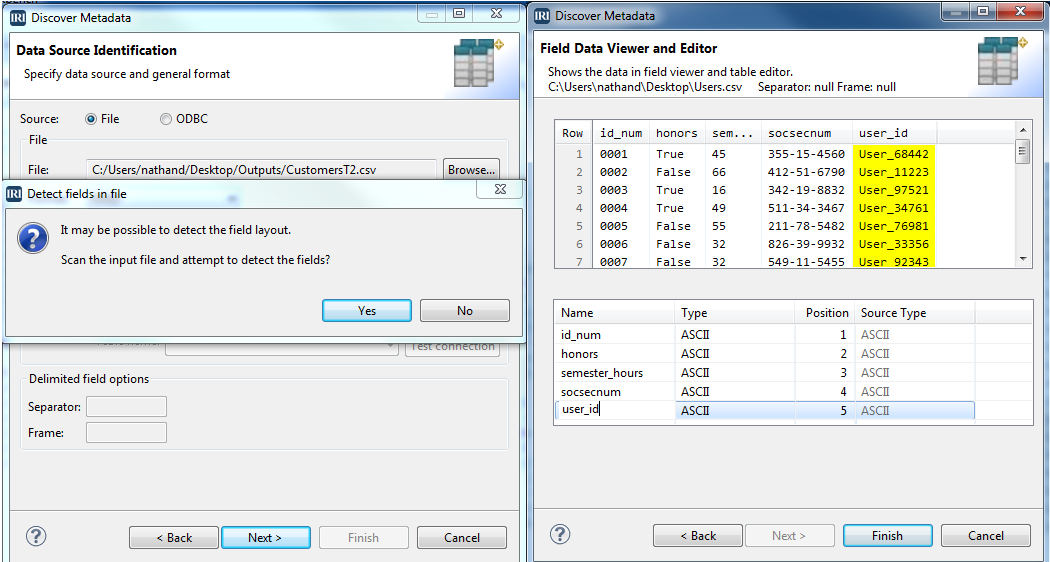
Opening and Defining the CSV Source
- From the top toolbar of the IRI Workbench GUI for FieldShield (built on Eclipse), find the FieldShield icon and select ‘New Protect Job’ to run the wizard. Name your job file, “CassShieldJob.fcl” and click ‘Next’.
- Click ‘Add Data Source’, and then ‘Browse’ to the CSV file you created with your export. Then click ‘OK’.
- Click ‘Discover Metadata’ and name the (re-usable data definition file) “StudentsMeta.ddf” and click ‘Next’. Click ‘Yes’ to auto-detect and “Get field names from header row’ before clicking ‘OK’, then ‘Finish’.
- You should now see your fields in the Data Sources list. Click ‘Next’.
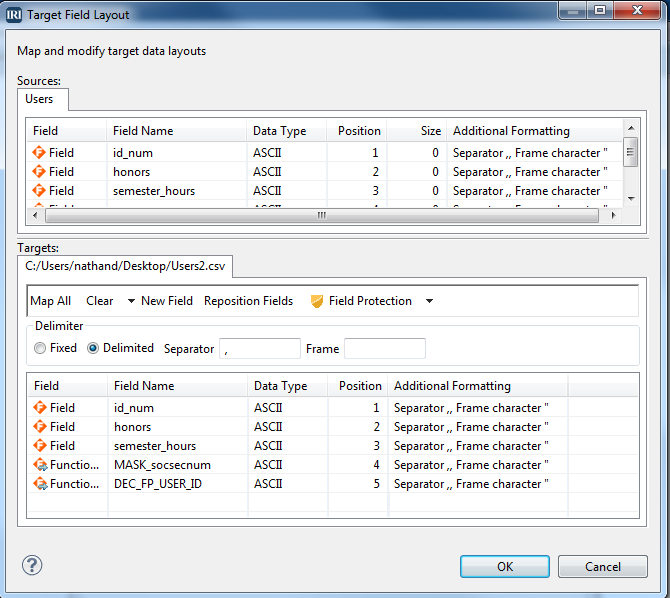
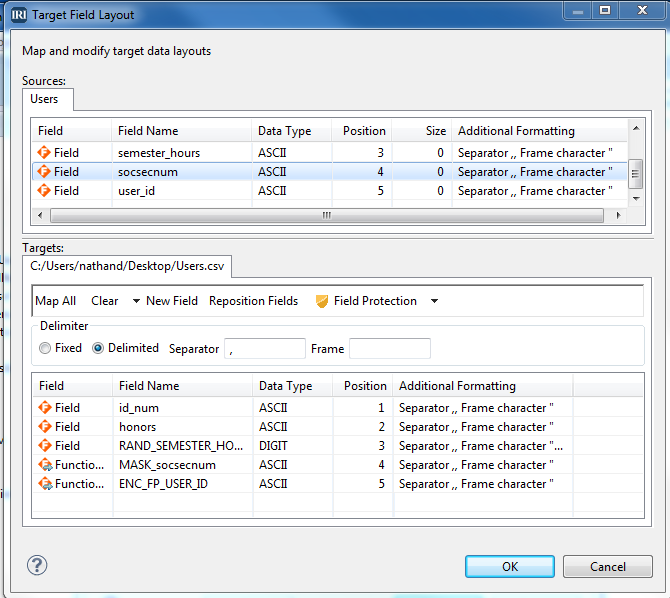
Applying the Protections
- Click ‘Add Data Target’ and browse to create a new CSV file target to hold the protected version of the data (or to overwrite the source, use the same path/file. Then click ‘Target Field Layout’, to review the layout and apply the protections to the output fields. There are two list boxes; the top shows the source fields, and the bottom shows the target fields to which you will apply the field “shields.”
- Randomize semester_hours: Select the semester_hours field name in the target pane and click ‘Field Protection.” Select Random Value Generation, and for type, select Digit. Set the random minimum and maximum sizes to 2 and click OK.
- Mask socsecnum: Select the socsecnum field and click ‘Field Protection’ again. Select Masking, and choose the default USA SSN option to expose only the last four digits of the SSNs. Click ‘OK’.
- Encrypt user_id: Select the user_id and click ‘Field Protection’ again. Select Encryption and Decryption and choose enc_fp_aes256_alphanum for format preserving encryption. Enter a passphrase (the decryption key) and in the Exclude box type “User_” to prevent the User_ part of our username from being encrypted, Then click ‘Finish’.
- The fields to be protected should appear as follows:
Click ‘OK’, and then ‘Finish’ to see the actual (executable job) script created for you:
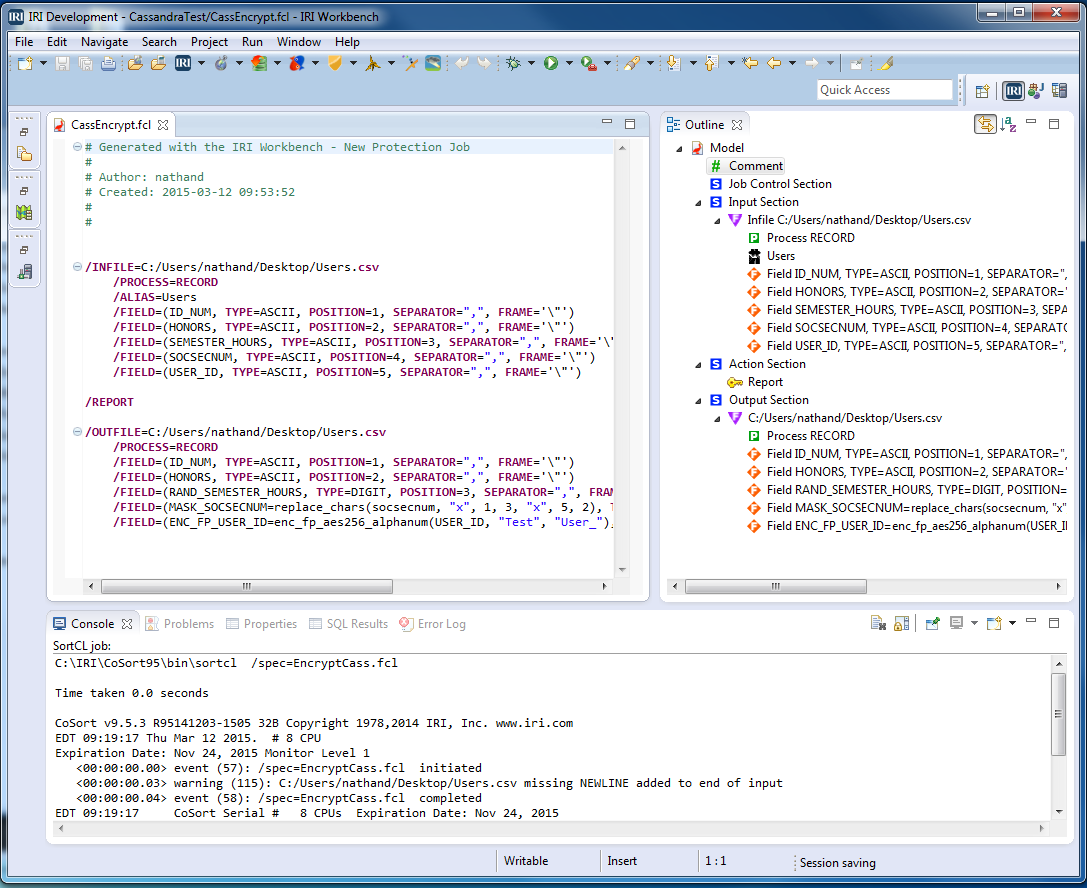
Run the job in the IRI Workbench or on the command line,
fieldshield /spec=CassShieldJob.fcl
The CSV file you created will contain the new masked and encrypted data.
Importing the protected data into Cassandra
To import the changed data back into Cassandra, use the following command in the Cassandra CQL shell:
COPY <Table you are importing data to> (field1fromCSV, field2fromCSV, ...) FROM '<Path to CSV>';
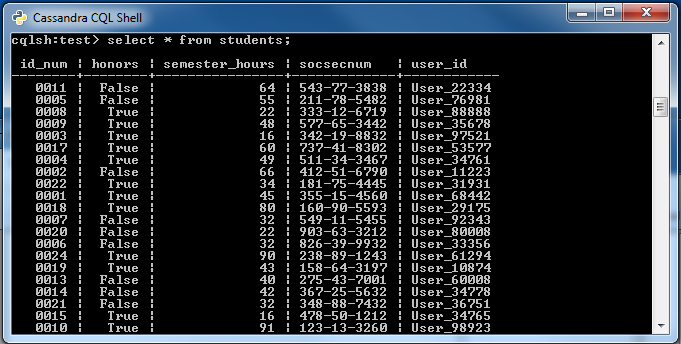
Protected data in Cassandra
For details on FieldShield capabilities, see http://www.iri.com/products/fieldshield/technical-details.