Testing and Masking Singapore NRICs
Singapore NRICs are used in much the same way Social Security numbers are used in the United States. The Singapore NRIC identifies citizens, permanent residents, or any other person who has entered the country for an extended stay on visa. It consists of nine characters, in the format:
@0000000#
The @ character represents residence status. The next seven digits represent a random serial number, except the first two are the birth year for permanent residents born after 1967. The last character is a check, or validation character.
Creating NRIC Test Values with RowGen
A new library function is available for IRI RowGen users who wish to generate properly formatted, computationally valid Singapore NRIC values. Call the special function within a RowGen job script like this:
/INFILE=random
 /PROCESS=RANDOM
 /INCOLLECT=1
 /FIELD=(NATID=natid_gen_singapore("PERMANENT", "1991"), TYPE=ASCII, POSITION=1, SIZE=20)

/REPORT
/OUTFILE=test.out
 /PROCESS=RECORD
 /FIELD=(NATID, TYPE=ASCII, POSITION=1)
The output from this routine is:
T9119134I
where the “incollect” value determined the number of test values produced.
When trying to create a valid Singapore NRIC, like the above example, use the syntax:
/FIELD=(FieldName=natid_gen_singapore("ResidenceType", "BirthYear"), TYPE=ASCII, POSITION=1, SEPERATOR="\t")
where:
- FieldName is the desired name for the field (e.g., NRIC)
- ResidenceType is either PERMANENT or TEMPORARY
- BirthYear is the 4-digit year of birth year
Masking Real NRIC Values with FieldShield
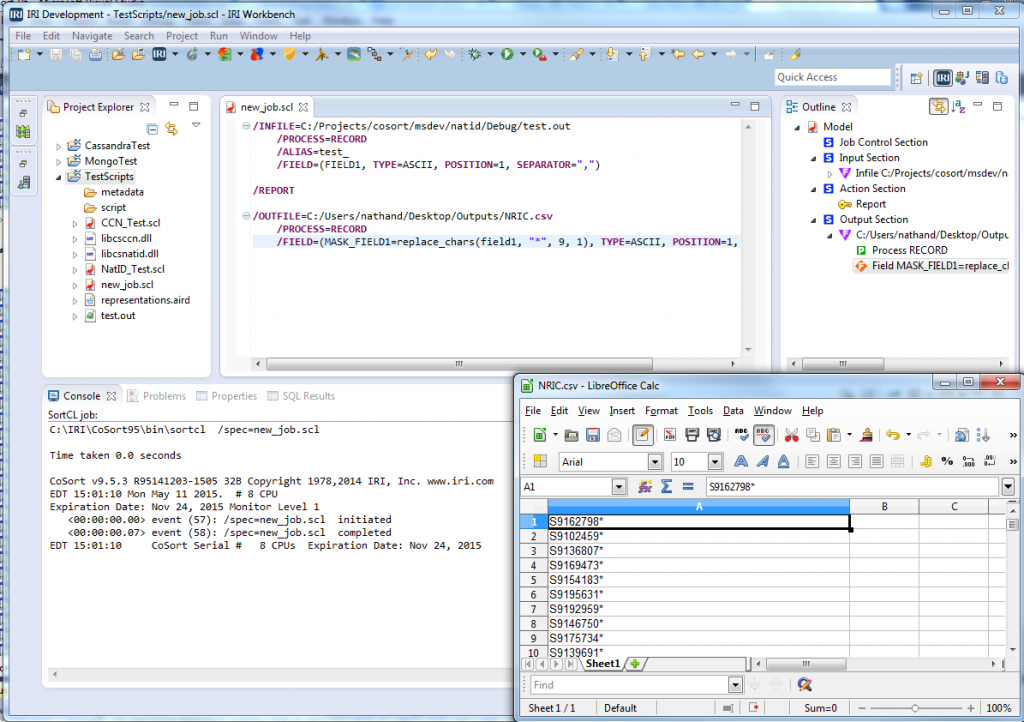
IRI FieldShield now also facilitates standard redaction for NRICs in production data sources. The FieldShield data masking dialog available in the IRI Workbench GUI for FieldShield can mask all Singapore NRICs in one or more data sources (if applied as rule).
For example, from the ‘New Protect Job’ wizard in IRI Workbench,
- Specify your project folder and a file name for the FieldShield Control Lanague (.fcl) job script. Click “Next”to go to the Data Sources window.
- Click on “Add Data Source…” and browse to the input holding the Singapore NRICs to mask. Click “Open” to select it, and “OK” to return to the Data Sources window.
- Click “Discover Metadata…” and enter a name for the .DDF metadata file. Click “Next” and in the new Format window, select “DELIMITED”, and specify “,”. Click “Next” to see the table items displayed, and ‘Finish” to return to the Data Sources window. Click “Yes” in the prompt to apply the DDF fields to this job.
- Click “Next” to open the Data Targets window, and “Add Data Target…”. Browse to a target that will receive your (masked) data, click “Open” to select it, and click “OK” to return.
- Click “Target Field Layout…” and in the mapping window select your NRIC field name in the targets tab, then “Masking” from the “Field Protection” menu. Select Singapore NRIC next to the Mask label, and click “OK” twice to return to Data Targets.
- Once you’re done, click “Finish” to generate the job script.
Output script / masked data
Please submit feedback on this article below, or contact info@iri.com for more information on RowGen for generating synthetic test data or FieldShield for masking production data.


