Incremental Data Replication in IRI Workbench
Our first article on data replication in the IRI Workbench GUI for NextForm (DB edition) or Voracity demonstrated how to copy and transform data as it moved from Oracle to two targets. This article shows how to synchronize incrementally a production and backup table in separate databases.
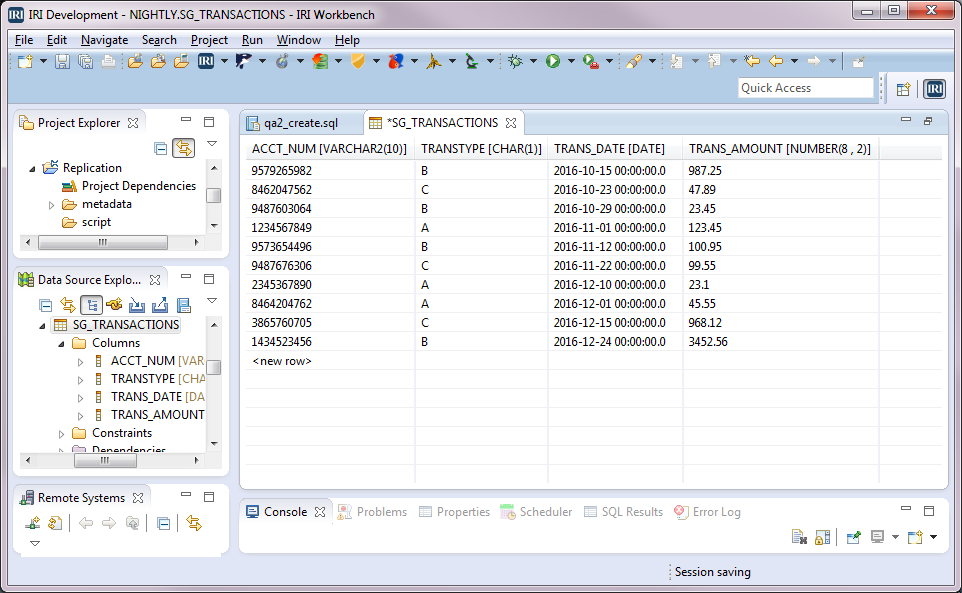
In this case, the production database is Oracle, the backup database is MySQL, and the table is named SG_TRANSACTIONS in both. There are transaction rows that contain the account number, the type of transaction, the transaction date, and the transaction amount with the column names ACCT_NUM, TRANSTYPE, TRANS_DATE, and TRANS_AMOUNT.
Note that you can also create tables by defining and executing statements in SQL files within IRI Workbench.
Run the Wizard
There are wizards in IRI Workbench that can be used to create a migration job script that will copy the rows from one table to another. In this case, we will replicate the data from the ORACLE table SG_TRANSACTIONS into the MySQL table SG_TRANSACTIONS.
I previously created the project Replication. We should click on that folder in the Project Explorer to highlight the project before running the wizard. This ensures that the wizard will save my job script in that folder. Our replication job will be created through a wizard available from the NextForm Menu in the toolbar.
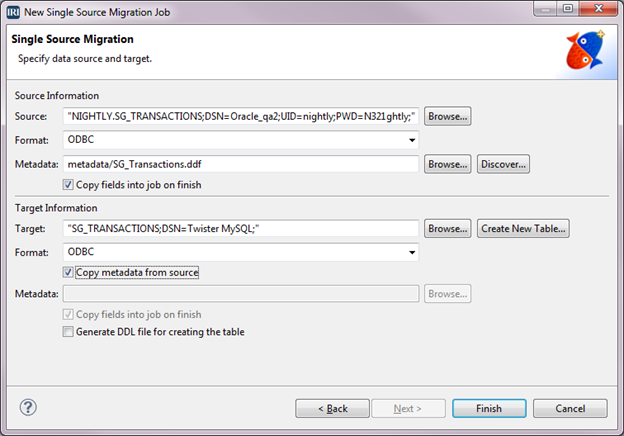
To run the wizard, click on the arrow next to the NextForm icon. Note that in the previous article we used the New Reformat Job wizard because one of the targets was filtered, masked, and reformatted. Since this case is straight-through replication, we’ll use the New Single Source Migration Job wizard instead.
On the wizard’s first screen called Job Specification File, verify that the Folder field has Replication as the (project name) value. In the File Name field, type in the name of the job script we are creating; I called it SG_Transaction_Transfer. Select the Create script radio button, then select Next to go to the Single Source Migration window.
Under Source Information, select the Browse button next to the Source field. Now select the ODBC radio button in the Data Source window, and click the Browse button.
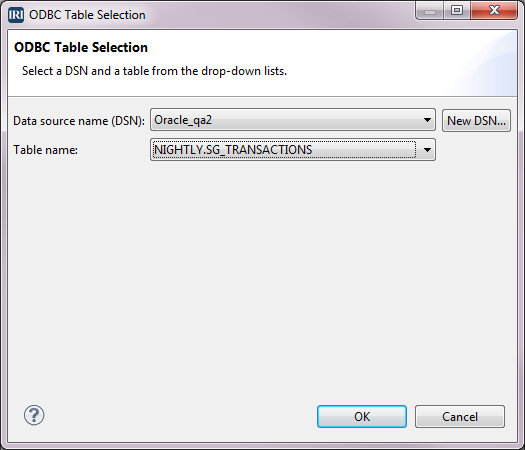
In the ODBC Table Selection window, select the DSN from the dropdown list; then select the Table name, and click OK. ODBC is used to connect to our source and target database tables when moving data using our job scripts. Click OK again to return to the Single Source Migration window.
Browse or Discover Your Source Metadata
All IRI programs require metadata layouts for your data sources and targets in a standard data definition file (DDF) format. These layouts are normally created once, stored centrally, and used as references for your mappings and models.
If a metadata file has already been created, then under Source Information, click the Browse button next to the Metadata field. In the Open Metadata window, select the metadata file in the Matching Items box that defines the columns in the SG_TRANSACTIONS table. Then click OK to return to the Single Source Migration window.
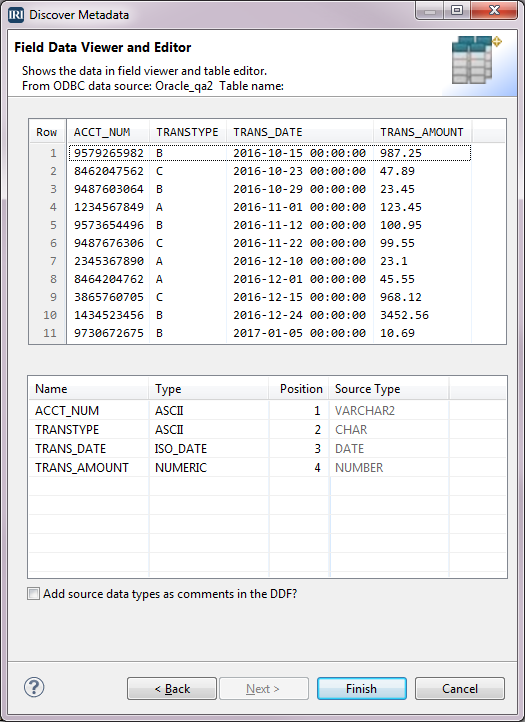
If you need to create the metadata file now, select the Discover button. This takes you to the Setup Options window. Verify that the folder is /your project name/metadata. In the File name field, type in the name for the metadata file and click Next. In the Data Source Identification window, verify that the fields are filled in correctly and click Next to go to the Field Data Viewer and Editor window.
The top half of the window has the column names and a sample of the records in the table, if any. The bottom half has the field Name to be used in the job script, IRI’s equivalent data Type for the original database Source Type, and the ordinal Position of the field (column). Click Finish.
You are now back in the Single Source Migration window.
Define the Target
Under Target Information, select the Browse button next to the field for Target. Now, in the Data Target window, select the ODBC radio button and click the Browse button next to the ODBC field. Then select the output DSN and Table name (Twister MYSQL and SG_Transactions) in the ODBC Table Selection window. Be sure to select the box for Copy metadata from source. Click OK, and click OK again.
All the necessary information is now in the Single Source Migration window. Click Finish.

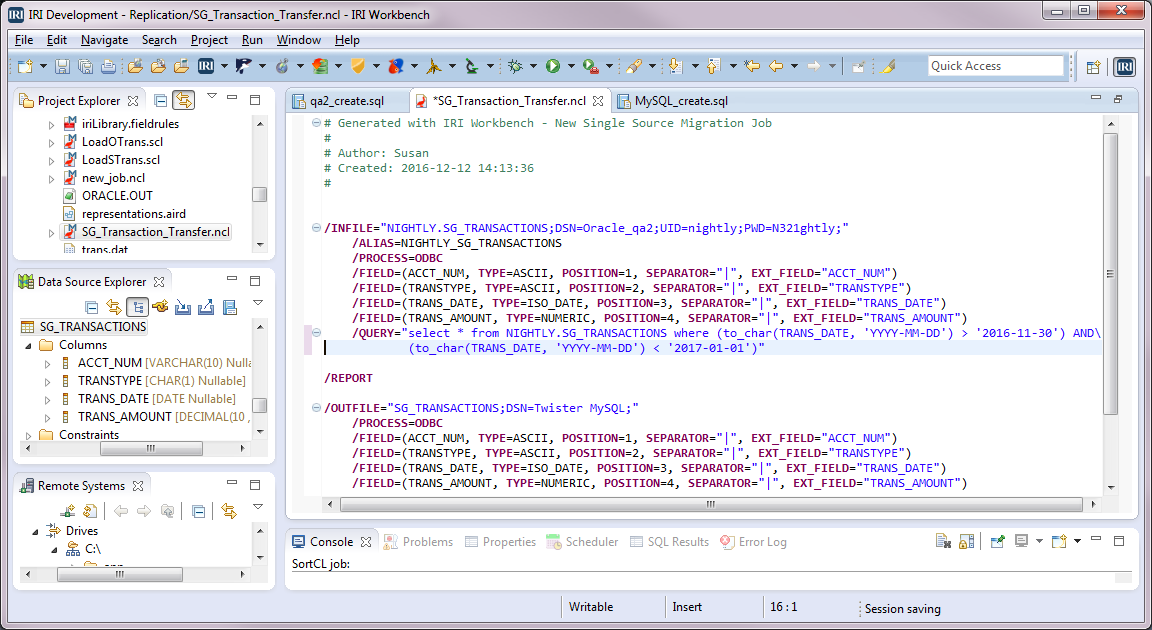
The NextForm control language script SG_Transaction_Transfer.ncl is created and can be viewed in the IRI Workbench color-coded, syntax aware text editor.
Replicate the New Records
This script will copy all the rows that exist in the SG_TRANSACTIONS table in Oracle to the same named table in MySQL. But, after the first execution, we only want to copy new rows to the backup table. To do this, we need to add a /QUERY statement to the input section of the job script so only the newest rows will be processed whenever you run the job (ad hoc or scheduled).
To modify the script from the IRI Workbench editor, right-click in the body of the script. Select IRI, then Edit Sources. In the Data Sources dialog window, select Edit Source Options.
At the bottom of the Source Options window is a Query field. This is where we add the SQL query statement that will only select the newest rows from the Oracle table. We will assume that this is a month-end process. The QUERY statement below filters rows for a one-month interval, but we could choose any interval. Instead of using specific dates in the script, we could also use environment variables to specify the interval.
select * from NIGHTLY.SG_TRANSACTIONS where to_char(TRANS_DATE, 'YYYY-MM-DD') >
'2016-11-30' AND  (to_char(TRANS_DATE, 'YYYY-MM-DD') < '2017-01-01')"
Now click OK, then Finish to update and save our original wizard-created job script with the new /QUERY statement inside:
The first time the script runs, the /QUERY statement should be commented out because we want all the records to be copied. After that, we want to run with the /QUERY statement to replicate rows from a date interval that has not yet been copied to the backup table.
This job can run from the GUI or command line where a NextForm DB edition, Voracity, or CoSort (sortcl) executable is licensed.
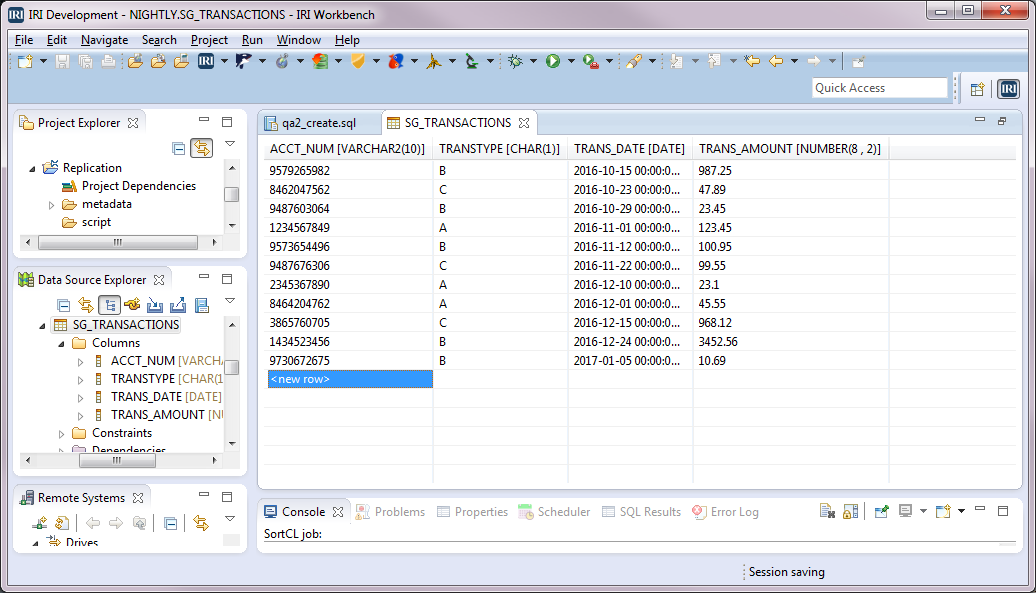
Here is a sample of rows in the production table:
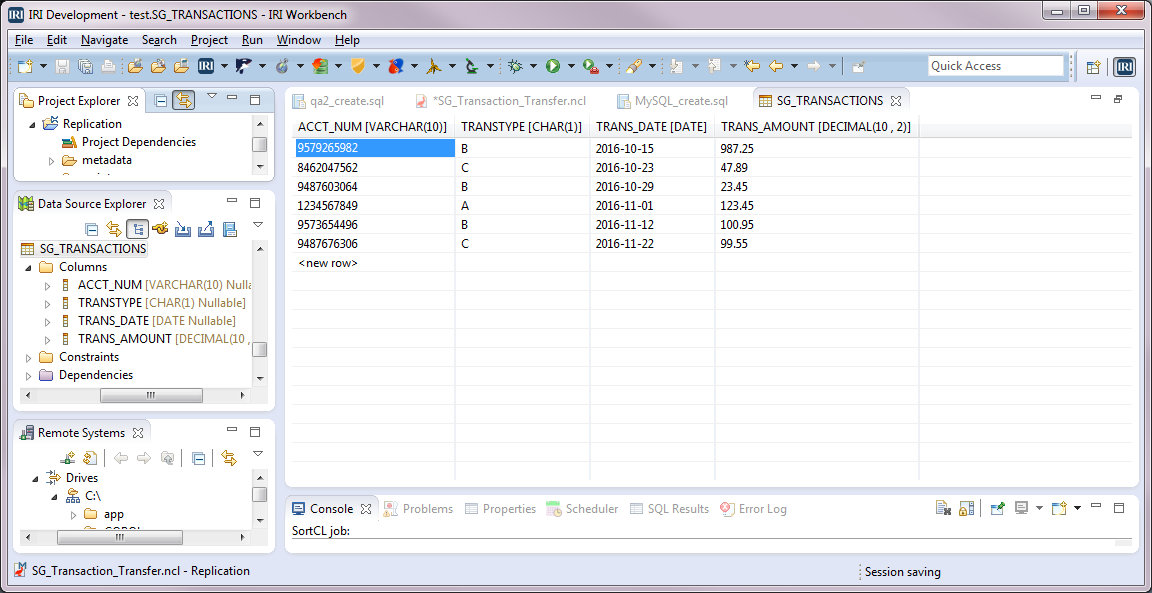
And here is a sample of rows in the backup table prior to running the December month-end backup. So, the rows in this table currently only go through the end of November.
After running our replication job with the /QUERY statement in it, only the December records are added to the backup table. Notice there is one January record in the production table, but this record has not been copied to the backup table because the date value for that row is outside our specified range.
It is also possible to add column-level masking functions to each target, as the job below shows:
See this example of replication between Oracle and MongoDB. For help replicating data on a one-off or recurring basis, email support@iri.com.
