How to Convert Flat-File Formats with IRI NextForm
The “New Reformat Job” wizard in the IRI Workbench GUI for NextForm 1 converts structured, or flat files to and from a variety of other formats, including fixed and delimited text, CSV, LDIF, XML, COBOL, and more.
This how-to example converts a delimited text file to a fixed-position layout, though similar steps can be followed for other file-to-file conversions. The same wizard can also be used to convert field data types and endian states at the field or file level.
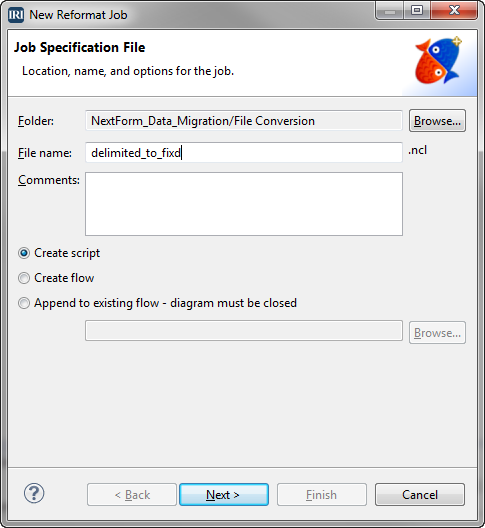
The first page of the wizard sets up the job with the location, name and options, such as whether you want to create the job as a script (in NextForm .ncl or CoSort SortCL .scl format) or a Voracity .flow file (containing the .*cl script within). For this example, we will call our job file name delimited_to_fixed.ncl (for NextForm Control Language).
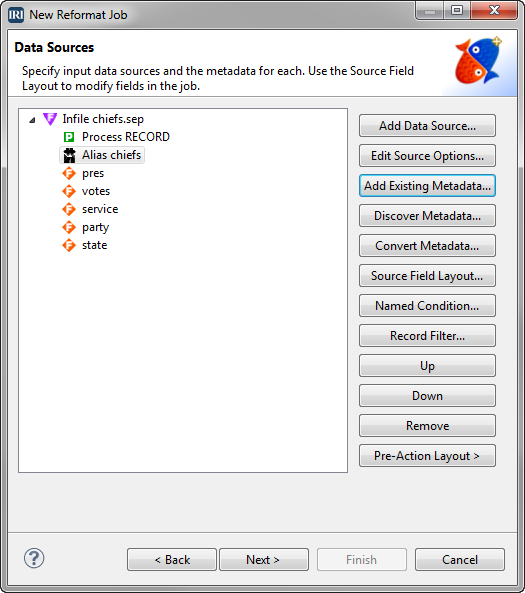
On the second screen, click Add Data Source to specify the input file chiefs.sep. You must also have the metadata for the input data. Since we have the metadata for this example, click Add Existing Metadata, and select chiefs.ddf.
After you click OK, the following message appears:
Would you like to copy the fields in the DDF to the job section? If No is selected, then a /SPECIFICATION with a reference to the DDF will be added.
Click Yes to display the fields. Although we have existing metadata for this example, alternatively, you could click Discover Metadata to create a new DDF for it automatically. See Using the Metadata Discovery Wizard for more information.
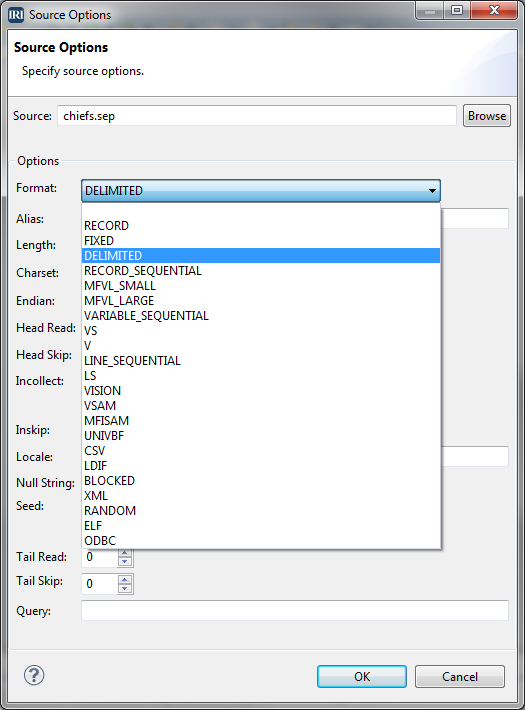
The process, or format, of this file needs to be specified as delimited. To make this change, click Edit Source Options to open the source options editor. Change the format from RECORD to DELIMITED, and click OK.

As you can see, a fuller range of supported source file formats are available to choose from, and this list is also exposed in the target options. These menus allow you to convert from an LDIF file to CSV, an ODBC-connected DB table to an XML file, MF Vision to text, and so on.
After specifying the data source, you are ready to specify the target file and its layout. Click Next to open the Data Targets screen.
On this screen, click Add Data Target to open the Data Target dialog. In the File field, enter the name fixed_file for the output file. Since this will be a fixed file, you need to change the format from RECORD to FIXED, so click Edit Target Options to open Target Options and make the change.
To make the new fixed file data easier to read and understand, add a header to the top to define the columns of data. Still on the Target Options editor, go to the Header Record field and enter the following header, including the double quotes:
“President <13 spaces> Votes <2 spaces> Service <6 spaces> Party <1 space> St”
The number of spaces indicates actual spaces entered with the keyboard spacebar.
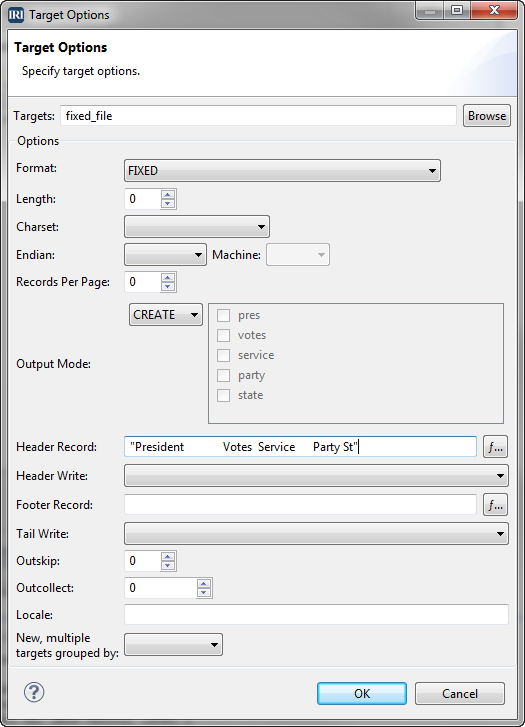
Note, again, the format could have been another file format. Click OK to close Target Options.
Back on the Data Targets page, click Target Field Layout. Now click the Fixed/Delim icon![]() at the top of the Targets section. In the Type field, select Fixed and click OK.
at the top of the Targets section. In the Type field, select Fixed and click OK.
You must now assign the position and size for each field. Click the position value and the size value on each field and specify the following values:
pres – position=1, size=22
votes – position=23, size=5
service – position=30, size=12
party – position=43, size=5
state – position=49, size=3
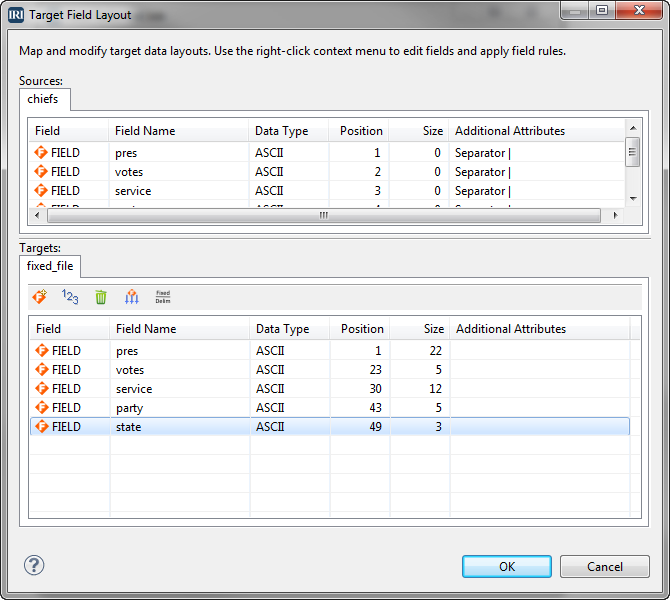
From the Targets section of this editing dialog, you can also right-click to edit the layout of each target field. This allows you to remove a field or modify its order, data type, endian, separator (or in this case, fixed byte offset), and other formatting attributes. You can also apply field-level mapping functions and rules, including string manipulations and cross-calculations.
When you are done, click OK to close the Target Field Layout.
The converted file will look better if there is some space after the header, before the first row of data. To do this, click Edit Target Options to open the editor again. In the Header Record field, after St (2-letter state), before the closing quotation marks, enter \n\n. This adds two line feeds to the header. Click OK.
Back again on the Data Targets screen, click Finish to complete and open the script.
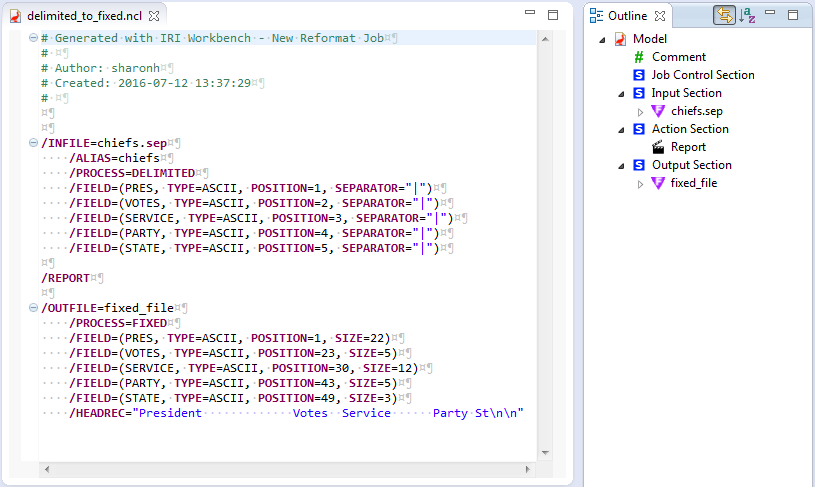
You can modify this script in the color-coded, syntax-aware editor directly, or by right-clicking in the script (or relevant portions of the outline) to open dialogs that expose the same parameters.
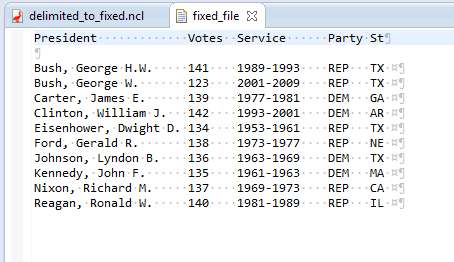
Run the script by right-clicking in the script and selecting Run As -> IRI Job. When you open the target file, you see that it represents the conversion of the original, delimited chiefs.sep file into a fixed file format, complete with a header record delineating the columns:
- The free Lite edition is one of the IRI NextForm data migration tools for Windows and Linux PCs. NextForm is also available for other platforms, and all NextForm jobs are supported in the IRI Voracity data management platform (for data discovery, integration, migration, governance, and analytics).
