Encrypt / Decrypt Sensitive Data in Excel Spreadsheets Using…
This is the third in a four-part series describing IRI CellShield data masking software for Excel, and its format-preserving encryption function in particular; the series overview starts here. Other articles in the series demonstrate how to use CellShield’s redaction and pseudonymization functions. If you’re interested in finding, classifying, or masking PII in databases or flat files, look into IRI FieldShield. For unstructured text, document, or image files, examine IRI DarkShield.
IRI CellShield secures personally identifiable information (PII) in spreadsheets. CellShield is offered in two product formats: an inexpensive Personal Edition (PE) add-in, or an Enterprise Edition (EE) for LAN-wide PII classification and discovery, automatic multi-sheet data masking, and audit logging. Both versions perform full or partial redaction, encryption (including format-preserving) and decryption, and pseudonymization:
Users can select a range of cells to protect, and then click the function they want to apply. CellShield offers an easy-to-use interface, and it does its work quickly – even on very large data sets.
For encryption purposes, the user establishes an appropriate passphrase to protect each applicable data set. CellShield will decrypt the protected content when the correct passphrase is entered. This allows only specific users to see the protected information, but allows others to work in the same spreadsheet without having access to that same information.
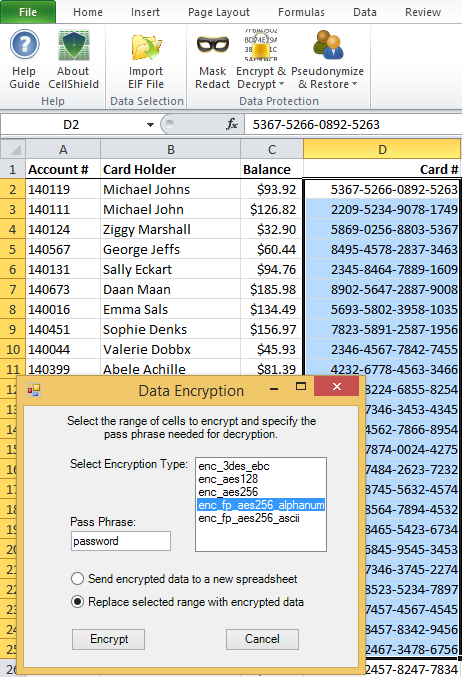
The example below demonstrates how easy it is to use CellShield’s ‘Encrypt & Decrypt’ feature to protect social security numbers in Excel. (Note: All information used in this example is fictional.)
1. Open the sheet containing the data you want CellShield to encrypt. Note that only some of the encryption routines available in IRI FieldShield, including format-preserving encryption, are supported in CellShield.
2. Select the range of cells to encrypt.

3. Click on the CellShield tab in the Excel ribbon.
4. Click the ‘Encrypt & Decrypt’ button on the CellShield menu; then select ‘Encrypt’ from the drop-down list.
5. Fill in all required information on the user form that pops up for ‘Data Encryption’ (passphrase is optional).
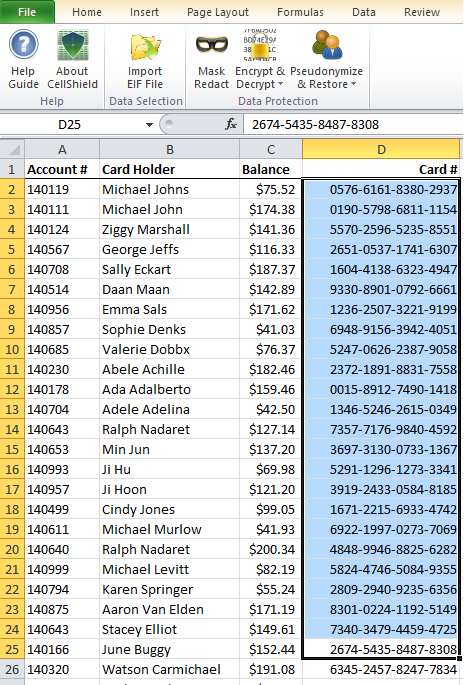
6. Then click the ‘Encrypt’ button on the form to populate the results in the desired location (either into a new spreadsheet or within the selected range).
In this case, the selected range was encrypted with a format-preserving encryption routine so that the cell values appear to be credit card numbers, but are protected. The original values can be restored only with the corresponding decryption routine and passphrase (encryption key) in IRI CellShield or IRI FieldShield.
UPDATE: In CellShield version 2.0, encryption (excluding format-preserving encryption) of non-ASCII UTF-8 characters is possible. For example, it is now possible to take this:
into this:
and back to the original text:
Additionally, encryption and decryption of formulas is available in CellShield version 2.0.
Read this article for more information on what is new in CellShield 2.






2 COMMENTS
If I apply CellShield to an Excel spreadsheet & send it to someone, will they be able to decrypt it on their end using just a password? Do all recipients need to have CellShield installed as well?
They will need their own licensed installation of CellShield (or if the data are moved into a flat file or database, IRI FieldShield) which has the corresponding decryption function. And they would need to use the same passphrase.