Preparing Unstructured Data for Splunk
Introduction: This example demonstrates an older method of using the unstructured data edition of IRI NextForm to extract dark data and prepare it for ingestion in Splunk for indexing and visualization purposes. As you will read, NextForm would process the data outside of Splunk and create a CSV file for input. IRI now offers a new add-on for seamless data preparation, indexing, and visualization in Splunk and information on the add-on is found here.
Splunk is not designed to index data from most unstructured, “dark data” text sources, as they are in highly encoded file formats. Attempting to index such files results in an excessive amount of encoding language that gets indexed instead of the relevant character data. Thus, Splunk cannot readily access meaningful data from these file types.
The Unstructured Data edition of IRI NextForm, however, can extract specific character data from doc/x, ppt/x, xls/x, pdf, rtf, txt, xml, and email repositories. Using regular expressions, the user can find and extract data that conforms to the desired pattern; for example, a telephone number, email address, or credit card number. And custom regular expressions can be used to extract specific data patterns.
All data matching the search pattern is written to a delimited text file. Once in that structured format, Splunk can automatically parse the values for quick and easy indexing. As a forensic aside, that results file can also include metadata information on each source from which the data was extracted, including the file path, file size, and date of creation.
In the how-to example below, unstructured data will be extracted from various file formats, including docx, PDF, ppt, and xlsx:
1) Gather or identify all the files you wish to search through within a folder. The wizard extracts and structures data in the following file formats: doc, docx, eml, pdf, ppt, pptx, rtf, txt, xls, xlsx, and xml.
2) Create a new project in the IRI Workbench.
3) Start the New Data Restructuring tool under the IRI icon.
4) Specify the top level UNC or folder name containing all the sub-folders with files you wish to search.
5) Select the file types you wish to search by selecting the corresponding extensions.
6) Select the metadata you would like to include in the output by checking the corresponding field types.
7) Name the data you are searching for in the Column Name text box. In the Search Pattern text box enter the regular expression that will identify the data structure you are searching for. In this example, email addresses will be extracted, and clicking the help icon at the bottom-left of the form reveals a list of common regular expressions.
8) Insert the pattern to the table of regular expressions that will be used during the search/extract operation.
9) Specify the delimiter to be used in the text file, then insert a comma.
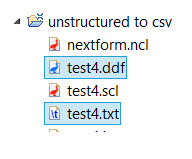
10) Browse for the location of the project created in the beginning to store the output, and enter a name for the text file (.txt). Do the same for the data definition file (.ddf), which gets created at the same time. Both names can be the same since they have different extensions, but make sure the names and extensions are correct before continuing.
11) Examine the preview of data matching the search criteria, as well as the metadata from each source you wanted.
12) Effect the extraction if you’re satisfied with the previewed results. The target files will be generated in the designated project folder.
13) Open the text file and type the names of each field from left to right, separated by commas. The field names must be inserted on the first line above the data to be recognized as headers.
14) Save the file with a .csv extension.
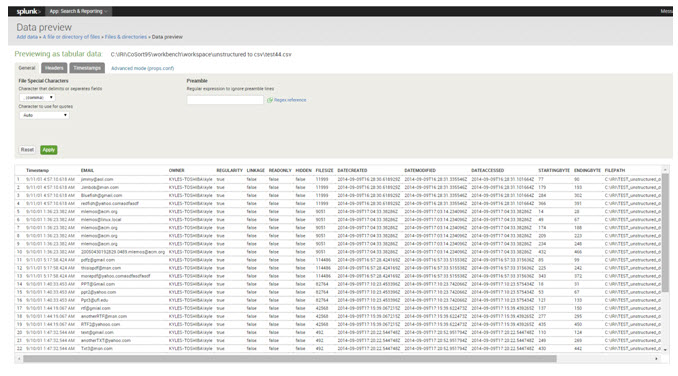
15) Index the reformatted .csv file into Splunk, and click save to complete the upload. The CSV format will be easily recognized and indexed without any configuration.
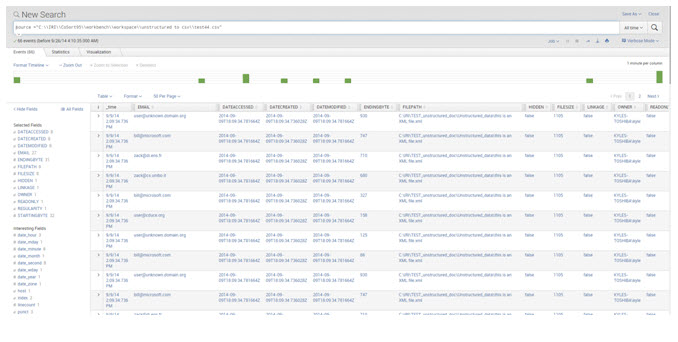
16) View the data by searching for the source. Enter Source = “File Path to CSV” in the search bar to view the data.
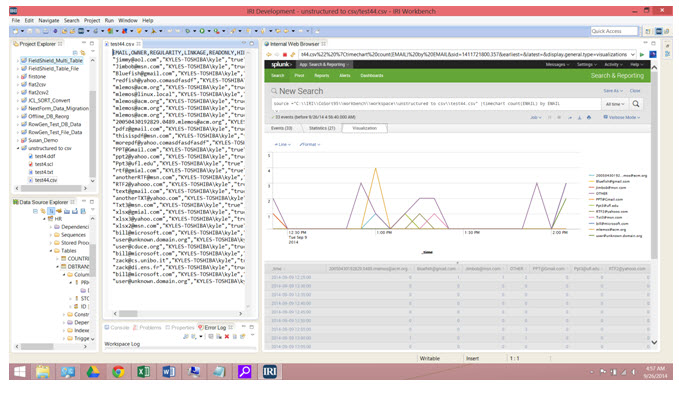
17) Visualize the data as you see fit, and even see your charts in an internal browser in the same Eclipse IDE (IRI Workbench), so you can see the results side-by-side with your data preparation activities.
 This Splunk chart displays the number of instances over time. Contact support@iri.com and reference this article if you have any technical questions.





3 COMMENTS
[…] Die resultierende Flat-File enthält alle Daten (und optionale Metadaten), die Splunk leicht indizieren kann…. und sogar in der gleichen GUI mit Ihren Datenaufbereitungs- und Verwaltungsaktivitäten anzeigen kann, siehe weitere Details in unserem Blog hier. […]
[…] Die resultierende Flat-File enthält alle Daten (und optionale Metadaten), die Splunk leicht indizieren kann…. und sogar in der gleichen GUI mit Ihren Datenaufbereitungs- und Verwaltungsaktivitäten anzeigen kann, siehe weitere Details in unserem Blog hier. […]
[…] Die resultierende Flat-File enthält alle Daten (und optionale Metadaten), die Splunk leicht indizieren kann…. und sogar in der gleichen GUI mit Ihren Datenaufbereitungs- und Verwaltungsaktivitäten anzeigen kann, siehe weitere Details in unserem Blog hier. […]