Connecting DarkShield to SharePoint
Abstract: This article describes how IRI DarkShield users can access files in SharePoint Online for searching and masking PII. It documents the setup steps you will take to use Microsoft Entra ID (formerly Azure Active Directory) for authorization, and configure DarkShield jobs in the IRI Workbench graphical IDE, built on Eclipse.
IRI DarkShield users interested in searching and masking PII or other sensitive data using the IRI Workbench GUI for DarkShield can now reach data sources and targets in SharePoint Online and OneDrive in the Microsoft Azure cloud environment. DarkShield also supports file sources and targets in Azure Blob Storage folders, Amazon S3 buckets, and Google Cloud Platform (GCP) stores.
IRI Workbench accesses SharePoint Online via the Microsoft Graph API. MS Graph API is a RESTful web API from Microsoft that provides the ability to access Microsoft Cloud service resources, including SharePoint Online.
Specifically, to access SharePoint Online using MS Graph API, it is necessary to register an application from Azure Active Directory. This article will show you how to do that, and to use the credentials from the app to access files in SharePoint Online from IRI Workbench … so that DarkShield can scan and mask PII within them.
Prerequisites:
- An Azure account with an active subscription
- Azure account should have permission to manage applications from Azure AD
- A tenant has been set up
Azure Active Directory App Registration Steps
Step 1
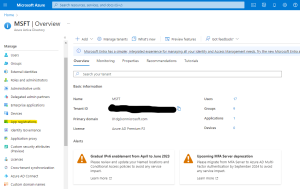
Login to your Microsoft account and go to Azure Active Directory from your home portal. Once inside Azure Active Directory we can start managing applications and permissions.’
Step 2
From the Azure AD page select App registrations from the list of options on the left under the Manage panel.
Step 3
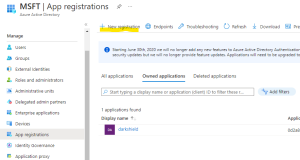
In this step we will begin the registration process for a new application by selecting New registration.
Step 4
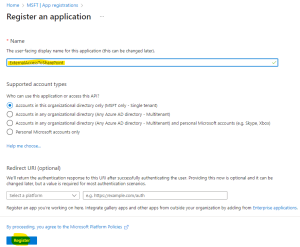
From the Register an application page, provide a name for the application, select the supported account types from the list of choices, and click the Register button.
Step 5
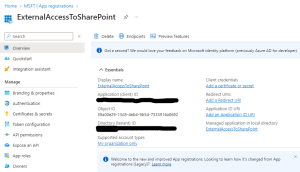
After the previous step is completed, a view of the created app and its current credentials are shown. Take note of the Application (client) ID and the Directory (tenant) ID values. In IRI Workbench these values will be needed later to connect to SharePoint Online.
Client credentials will also be needed but have not been created yet. Under Client credentials select Add a certificate or secret.
Step 6
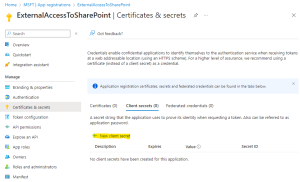
From the Certificates & secrets page select New client secret to receive the prompt to generate new credentials for the client.
Step 7
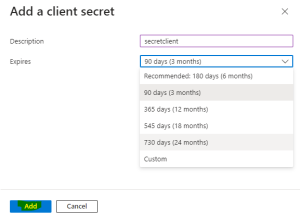
At the next prompt to Add a client secret, provide a description for the secret and an expiration date from among the possible choices or create a custom expiration date. Note that when the client secret expires a new secret must be generated for the application.
Once finished, click Add to generate a client secret and return to the previous page.
Note: make sure to record the client secret value credential for use later when creating a DarkShield job in IRI Workbench.
Step 8
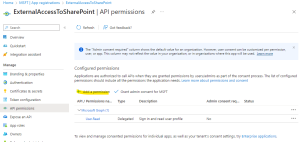
In the left panel under Manage, select API permissions. From this page a list of permissions granted to this application will be displayed.
To access and modify files stored within SharePoint Online the application must be given the necessary permissions. Select Add a permission, to be presented options.
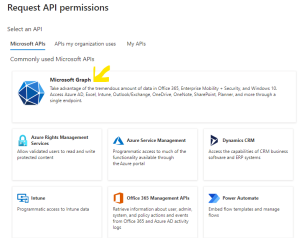
Step 9
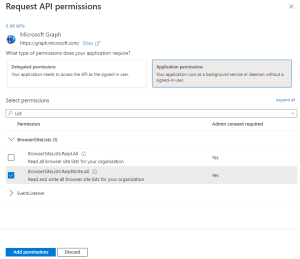
From the Request API permissions page, select Microsoft Graph box from the list of commonly used Microsoft APIs. This will bring up a list of available permissions for Microsoft Graph.
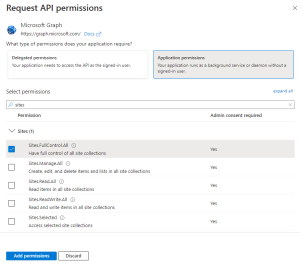
Step 10
Provide all the necessary permissions for Sites.
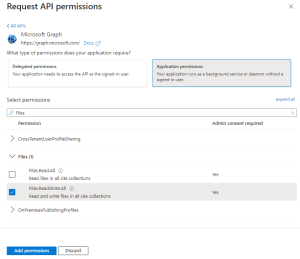
Step 11
Provide all the necessary permissions for Files.
Step 12
Provide all the necessary permissions for List.
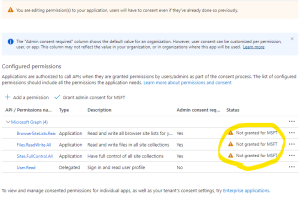
If you have added permissions for Sites, Files, and Lists. You should have these permissions listed under Microsoft Graph permissions list along with a status of Not granted.
Step 13
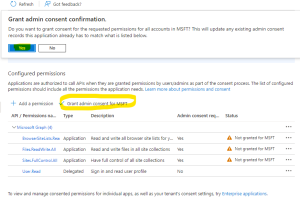
Next, these permissions must be granted consent. Select Grant admin consent. At this point, you will be asked for confirmation. Click Yes.
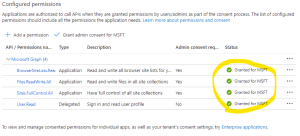
A green circle with a check will indicate the permissions have been successfully granted.
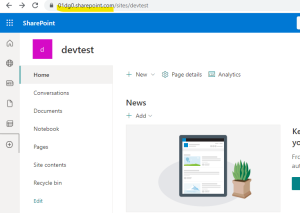
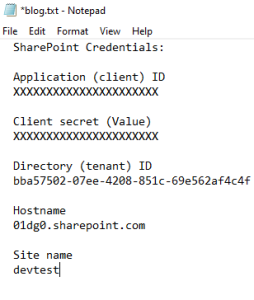
Make sure you have recorded all the necessary SharePoint credentials for a DarkShield job in IRI Workbench. These include client ID, client secret value, tenant ID, SharePoint hostname, and SharePoint site name.
In IRI Workbench
From the Setting up data connection(s) wizard, select the SharePoint Online file storage type.
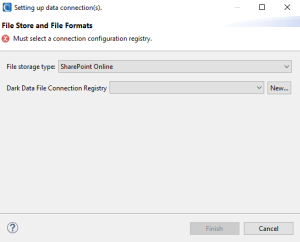
Then click New… to create a new connection registry for SharePoint which can be reused again in future DarkShield jobs.
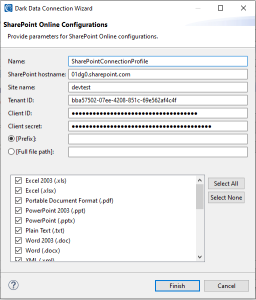
Fill in the required fields for the SharePoint Online connection, using the credentials previously recorded, and indicate the file formats to process.
Also optionally indicate a specific folder to read from/write to or specific file to read from/write to using a full path to the file. If neither is indicated DarkShield will search/mask the entire SharePoint file system.
Read or Write to Database:

Read or Write to Folder:

Read or Write to Specific File:

In Closing
If you have followed all these steps you should now have configured a Connection Registry that will allow you to access SharePoint Online using Azure Active Directory for authorization.
For more information on searching and masking PII in files through the DarkShield data masking tool GUI, see this article. For more information on DarkShield, or to get help using it, please email darkshield@iri.com.


