BigQuery Data Management via IRI Voracity
 BigQuery is a managed, serverless data warehouse in the Google Cloud designed to enable scalable analysis over petabytes of data. It is a relational database Platform as a Service (PaaS) which supports ANSI SQL queries. As such, it works with IRI software.
Connecting the Google BigQuery RDB to IRI Workbench and the back-end SortCL processing program is simple, and allows for the movement and manipulation of its structured data through compatible IRI products. This means IRI CoSort, FieldShield, NextForm and RowGen, or the IRI Voracity data integration and management platform which includes them all.
Connectivity follows the same paradigm as all the other relational databases which IRI supports. This means ODBC and JDBC driver downloading and installation, configuration (using and testing with your credentials), registration, and validation. Note that if you are using DarkShield, only the JDBC connection is required.
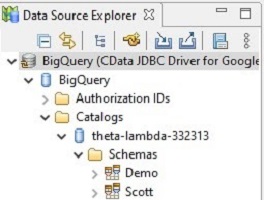
As Workbench is built on Eclipse, it needs a JDBC connection to view BigQuery schema and parse the table metadata. And to pass data between BigQuery and the SortCL data manipulation engine, an ODBC driver is also needed. The final result could be this:

Google has teamed up with Magnitude Simba to provide ODBC and JDBC drivers to connect to BigQuery. At the time of this writing however, its JDBC driver is missing key functions Workbench needs. To get around this, use the JDBC driver from CData.
This article provides step by step instructions for IRI software to access BigQuery.
Service Accounts in BigQuery
BigQuery authorizes access to resources based on verified identity, which needs a user ID in the form of a service account and a key/password. To create a verified identity, sign into BigQuery, go to Service Accounts under IAM & Admin and create an account:

The first field creates the name of the service account, for my set up I called it iri-simba. The second field will automatically be filled in with a service account email address using the name you chose. The last field can be skipped. Click Create and Continue.
Now that a service account is created, we can move on to the type of permissions this account can have. Click on Select a role and look for BigQuery to add specific roles for the database.

Hovering over each role will give you a quick description of what type of access this role will give to the service account; find a more detailed explanation here. This allows for greater control on giving specific users permission like the ability to be able to view tables, create queries or run as an administrator.
I chose the role of BigQuery User, which will allow this service account to view and manipulate tables. The “Grant user access to this service account” is skipped. Clicking Done takes you back to the service account main page where you can see the account:

Moving on to the second portion, let’s create the key that will be associated with the new service account. In the Action field, click on Manage Keys to create the key for the service account — either by adding your own key or having it created for you.
If you have Google create your key, it will present you two key type options, JSON or P12. Choose the JSON type because this key will also be used for the JDBC driver which uses the JSON format.
When the JSON key is created, it will be downloaded onto the computer. You can place it wherever you like, but remember the path because this will be used in setting up the ODBC and JDBC driver.
Now that the service account has been created and has a key that will act as the password, let’s move on to downloading the ODBC connection and setting it up.
ODBC – Download and Configuration
I am using a Windows operating system and choosing the 64-bit Windows version for compatibility with the CoSort V10.5 SortCL executable. Once you followed the instructions and accepted the license agreement for the Simba Installer, open the ODBC Data Source Administrator (64-bit) to configure the connection.

Simply add and look for the driver named “Simba ODBC Driver for Google BigQuery”.

With the driver selected, the setup page should look like this:

Here the configuration is really simple, starting with the name for the data source.
I chose the name Google BigQuery but you can choose any name for your use case.
For authentication keep the default option Service Account and move down to email. Here you can copy and paste the service account email that was created earlier in this article.
The field below (Key File Path) uses the path to the JSON key file as the input. At the bottom where it states Catalog (Project) click the drop down menu. If everything is configured correctly, it should show the name of the project and node that contains the datasets and tables.
You can do the same for the Dataset option, click the drop down menu to select a specific dataset or leave this empty to see all the datasets in this project. Finally test the connection to ensure everything is working correctly.
When ODBC is set up, we can configure the JDBC driver.
JDBC – Download and Configuration
Download the JDBC driver from CData here. Once the installation is complete there will be a folder called GoogleBigQueryJDBCDriver with a setup.jar inside.
The setup.jar will install all the files needed for the JDBC connection to work. It also contains a special jar to assist in creating the connection URL for the JDBC driver.
After setup.jar completes the installation, we need to have the configurations in Workbench ready. In the Data Source Explorer (inside of Workbench), add a new connection by clicking on New Connection Profile.

A pop will appear (like the picture below) and give several options on the type of connections that can be created. Select the Generic JDBC and give it a name such as BigQuery, this will make it easy to spot in the Data Source Explorer.

The next page will direct you to set up the driver and provide the connection details. Click on New Driver Definition that looks like a compass with a green plus sign.

The following page allows you to give a specific name to the driver if desired. Moving to the JAR List tab, this is where the required jars are added for the JDBC driver to function.
If the default location was used when installing the files for the JDBC driver, it should be located in the Program Files folder with the name CData. Inside the lib folder there is a Jar file called cdata.jdbc.googlebigquery.GoogleBigQueryDriver, add that jar to the list and proceed to the Properties tab.
*The default path is seen in the picture below if there is any trouble locating the jar file*

In the Properties tab, we need to create a connection URL, give a name to the Database, and specify the Driver Class. Focusing first on creating the connection URL, in File Explorer locate the jar file that was just added and execute it.
This will help create the connection URL in the format that CData suggests. As seen in the picture below, there are properties on the left that need to be set in order to create the connection URL.

CData has documentation on which properties need to be set depending on how the user chose to authenticate. Since we are authenticating with a Service Account the properties that need to be set are listed below.
- AuthScheme – Set to OAuthJWT
- ProjectID – Located on the home page of BigQuery
- InitiateOAuth – Set to GETANDREFRESH
- OAuthJWTCertType – Set to GOOGLEJSON
- OAuthJWTCert – Path to the .json file provided by Google
Once all the properties are set, test the connection to ensure that everything is working. If successful, copy the connection string at the bottom. If you exit without copying the connection URL, you’ll have to set the properties again.
Back in Workbench, paste the URL next to the Connection URL property and add the name of the database for the Database Name property. For the Driver Class property, there is a button with three dots in the empty field.
Click on it and it will give you the option to input the name of the driver class or have it scan the JAR List for the driver. Once everything is done it should look similar to this:

Click OK and you’ll be sent back to the “Specify a Driver and Connection Details” page. There is no need to add a username or password because all the information is in the connection URL. Test the connection one last time and click finish.
The connection profile will now be visible in the Data Source Explorer and the schemas/tables can be seen once you right click on the profile and choose connect.

The last task is to create a Data Connection Registry that maps the DSN to the Connection Profile that was just created. Go to IRI Menu, select preferences and locate the Data Connection Registry as the picture below suggests.

On the left is the DSN and on the right are the connection profiles. Locate the DSN created in the ODBC section above and click Edit…. Select the DSN, the version, and connection profile.

Since the DSN has the credentials saved in the connection URL there is no need to authenticate with a user/password. Click OK and Apply and Close to exit the menu.
You are now done with the database connectivity steps for Google BigQuery. If you need assistance, email support@iri.com.
