Data Class File Masking
The Data Class File Masking Job wizard in IRI Workbench protects large numbers of structured file sources that have been previously classified. While it was possible to use the data classes in many of the existing wizards, if the data class library included a lot of classified fields, selection of the classified sources was cumbersome. Additionally, only one file at a time could be protected. This wizard allows selection of multiple sources.
While this example will not show all the prerequisite steps, here is an overview:
- Set up data classes in preferences.
- Create field rules.
- Create a data class library (in this example, using the Directory Data Class Search wizard). Make sure that data classes are mapped to fields.
- Assign default rules to data classes in the data class library.
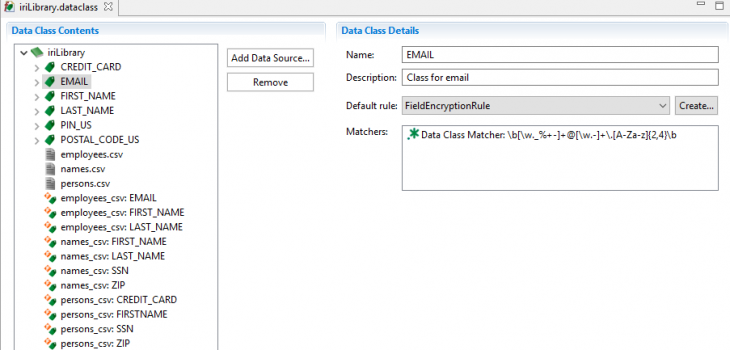
In this library, there are three csv sources. There are six data classes that are used in eleven data class mappings. There are different rules assigned to the data classes.
Begin using the wizard by right-clicking the data class library in the Project Explorer and selecting Mask Included File Sources.
On the setup page, enter the job details. There is an optional summary page; however, it is not recommended to display it if there are a large number of sources as it may take a while to load. In this example, check the box for the summary page to be shown. Select an output type. Same will overwrite the existing file. Different will create a new file in a location selected on the target page. Click Next.
The filter page allows the inclusion of selected data classes only. A warning will be shown if any of the selected data classes do not have a default rule assigned. Click Next.
The source page is populated with the data sources that are referenced in a data class map, even if in different locations. In this case, all sources in the library had a mapping and are listed below. Select the data sources to be protected by this job. Click Next.
The target page is where the target details are entered. Enter the location where the output files will be created. Click OK.
The summary page displays the data class rules and which fields will be using that rule. Click Finish.
After the wizard closes, a Flow Diagram of the job is opened. It displays the components produced for the designed output. It includes three transform mapping blocks representing scripts. The files are contained in the project folder and also include an executable script to run the job.
Below is one of the scripts that is produced by the wizard. This particular source had four classified columns which were transformed using the two different rules. The outline displays a different icon for the four fields that are now protected.
This wizard saves time by creating multiple task scripts, masking many different structured files in the same job.


