
Directory Data Class Search Wizard
This article discusses the Directory Data Class Search wizard in the IRI Workbench GUI for FieldShield. This data discovery jobs built in the wizard scan directories that you select on local or networked nodes 1 to: 1) log and chart PII it finds; and, 2) classify the data, in flat files.
In addition to creating PII search reports, the wizard automatically records the mappings of fields matching your search criteria to your masking rules into a Data Class Map file. This Data Class Map file is used in the New Directory Data Class Map Masking Job … wizard to build multi-file masking scripts.
More specifically, the Directory Data Class Search wizard performs data classification using objects called Data Classes which represent PII categories (like email address, credit card number and last name). Associated with these classes are Search Matchers which identify matches to the data content in, or the metadata of, files in one or more directories.
The data classes – as well as the search criteria and masking rules assigned to them – are stored in your Data Class & Rule Library, not to be confused with the Data Class Map. You should have first built (or approved a default or provided) Data Class & Rules Library when you created your project folder.
Why Perform a Directory Data Class Search?
As mentioned above, a Directory Data Class Search will perform data discovery on multiple files in a directory or directories and produce a Data Class Map. The Data Class Map is used by several wizards, including the New Data Class Map File Masking Job wizard in IRI FieldShield which builds .fcl (FieldShield Control Language) jobs to mask structured data in one or more files in a directory.
Prerequisites
Before performing a Directory Data Class Search operation, two initial setup steps are required:
- An IRI Project must be present in the workspace (Workbench project folder).
- There must be a Data Class & Rule Library (.dcrlib) available that contains at least one Data Class. You have the option when first creating an IRI project to generate a Data Class & Rule Library pre-populated with some default Data Classes and Rules.
To learn more about Data Classification and Data Classes read this article.
Using the Directory Data Class Search Wizard
The Directory Data Class Search wizard can be accessed from the Discovery Menu.
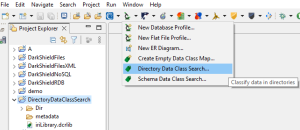
From the Discovery Menu, select Directory Data Class Search… to start the wizard.
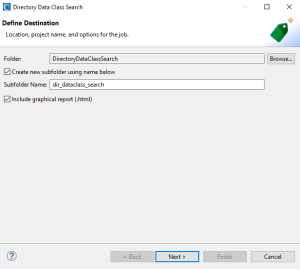
The first page is for configuring initial job setup details. Indicate the project this task is associated with, the name of the subfolder that will contain the search result files, and select whether you want to display aggregate search log information in HTML5 dashboard charts.
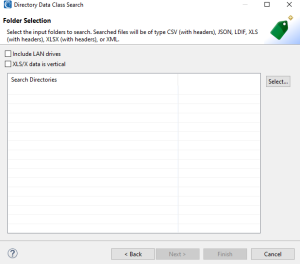
The next page is where you choose the folder(s) containing files to search and classify. You have a couple of options to consider here before moving into the Directory Selection page.
The first option gives you the ability to include directories in your local area network. The second option dictates whether XLS/X (Excel) files should be assumed to have vertical headers instead of the default assumption of horizontal headers.
Once satisfied with the settings click Select… to open the page from which folders are selected:
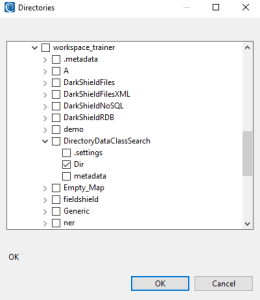
You are presented with a tree view of available folders (directories). To view folders nested inside other folders, click on > next to a directory node to expand and view its child folders.
On this page, you can select multiple folders. Once finished click OK.
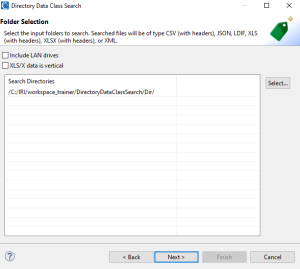
As you can see from the image above, an entry has been added to the Search Directories list. Repeat the process of selecting directories as many times as needed. Click Next > to move on.
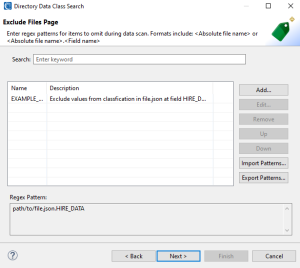
On the third page, you can optionally provide Regex patterns to exclude fields in files based on the name of the file plus the field name. Specifying particular patterns to ignore fields during searches will reduce scanning volume and thus the time needed for data classification.
On this page, enter the pattern for each excluded item, following this format:
<Absolute file name>.<Field name>
See the example shown on the screen above.
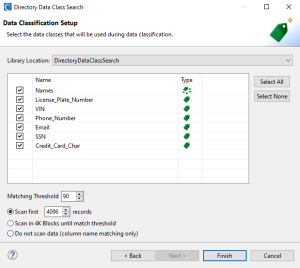
The fourth and final page is the Data Classification Setup page. On this last page, several options will determine how PII and other sensitive data are found and matched during the data classification process.
First, choose an existing IRI project with a Data Class Rule Library in it from the top dropdown menu. Based on the Data Class Rule Library selected, the data classes belonging to the library will be displayed in the table.
Check on or off to the left of each data class to determine which data classes should be used during the data classification process. Again, to learn about data classification and the different search methods to match PII, see this article.
After indicating which data classes to use in searches, you can configure “depth of matching” parameters for the data in your files. The first parameter is the matching threshold, which will stop the scan once the matching threshold is reached after N number rows of data (see below).
For this example, say the default threshold is set to. This means that if 90% of the first group of data in a column matches against a specific data class, scanning down that field stops and moves on to the next field in the file.
The second parameter for depth of matching determines how many rows (records) in a file(s) may be potentially read and scanned. The default option is to scan the first 4096 (or some other specified number of records) and determine if there is a match based on whether the matching threshold was met. If no match is found in the first block of records in that field, scanning moves on to the next field.
If you need a more thorough scanning process, the second option is a better choice, but it can increase the amount of time it will take to scan the file(s). This is because the process continues to search through the fields in 4K blocks until it reaches the matching threshold or there is no more data.
You can instead choose to not match the data itself, but just on the column name. This will speed up the matching process in exchange for losing the ability to analyze the data itself.
Clicking Finish starts the search/map process. Depending on the volume of data you’re scanning, the scan may take a long time. At the end of this search, you will see these artifacts:
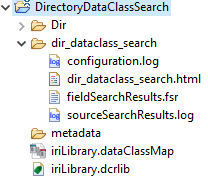
Files (except .dcrlib) produced from Directory Data Class Search
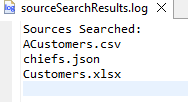
A file called sourceSearchResults is created and records every file that has been fully processed. In case of a failure during the search, this file will show the last file that was successfully searched.
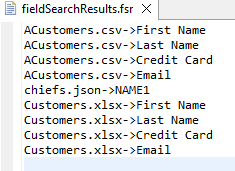
If a match was found during the data classification process on fields, a file named columnSearchResults gets appended with the name of the file and the column where a match was found.
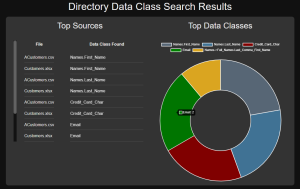
If you had chosen to generate an html report on the initial setup page, a discovery pie chart will be built to display the data classes that found matches. Hovering over each section of the pie chart reveals the number of matches for the data class associated with that section.

Once the directory data classification has finished, a Data Class Map file (.dataClassMap) will be generated and a form editor for the map will open automatically. From the Data Class Map, you can see the results of data profiling and make various additional changes.
To learn more about the Data Class Map read this article. If you need help using the Directory Data Class Search wizard, please email fieldshield@iri.com.
- Uses SMB convention. If your files are in these cloud stores, you must first copy those files that need to be searched or classified into a local folder that IRI Workbench can access.


