Data Federation in IRI Workbench
The “New Reformat Job” wizard in the IRI Workbench NextForm menu virtualizes disparate data sources to produce immediate, fit-for-purpose views. This feature provides a simple and free or low-cost data federation vehicle for IRI NextForm, IRI CoSort, or IRI Voracity platform users. 1
“Data federation technology can be used in place of a data warehouse to save the cost of creating a permanent, physical relational database. It can also be used as an enhancement to add fields or attributes that are not supported by the data warehouse application programming interface (API).
This approach is especially useful if some of an organization’s data is stored offsite by a third-party cloud service provider. It allows the person performing the analysis to aggregate and organize data quickly without having to request synchronization logic or copy the data until it’s absolutely necessary.” – TechTarget SearchDataManagement.com
In this how-to example, the wizard combines data elements from a database table and a delimited file, and sends pertinent, reformatted information to the console. You can follow similar steps to federate other data combinations and what-if scenarios, and save them to (persistent) targets, if preferred.
Target option and field editing dialogs exposed in the same wizard can also be used for cross-calculation, remapping, masking, type conversion, string manipulation, etc.
Getting Underway
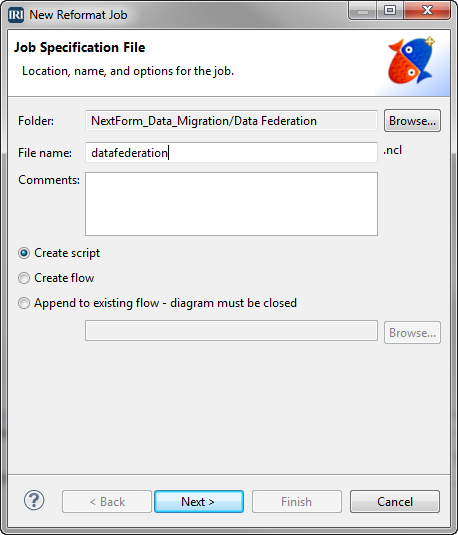
The first page of the wizard sets up the job with the location, name and options, such as whether you want to create the job as a script (in NextForm .ncl or CoSort SortCL .scl format) or a Voracity .flow file (containing the .*cl script within). For this example, we will call our job file name datafederation.ncl (for NextForm Control Language).
Specifying the Source(s)
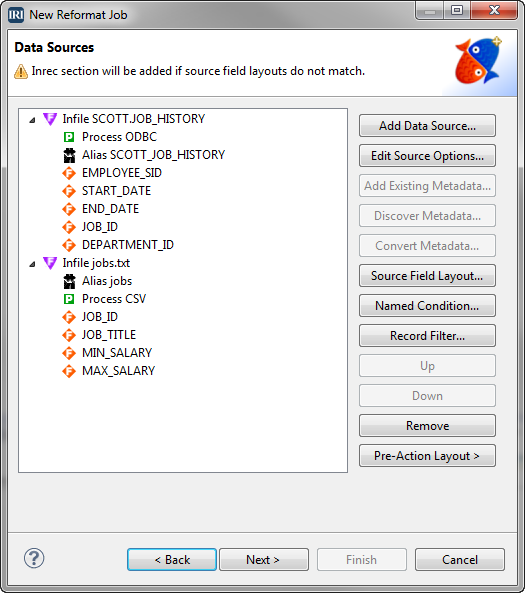
On the second screen, click Add Data Source to add the first of the two sources used for this example. On the Data Source dialog that opens, select ODBC and click Browse. Select Oracle in the Data source name field. From the tables listed in the Table name field, select JOB_HISTORY and click OK. Click OK again to close the Data Source dialog.
You must also have the metadata for this table. Since we have the metadata for this example, click Add Existing Metadata, and select historytable.ddf.
After you click OK, the following Save specification message appears:
Would you like to copy the fields in the DDF to the job section? If No is selected then a /SPECIFICATION with a reference to the DDF will be added.
Click Yes to display the fields. Although we have existing metadata for this example, alternatively, you could click Discover Metadata to create a new ddf for it automatically. See Using the Metadata Discovery Wizard for more information.
Click Add Data Source again to specify the second source. Select Files and click Browse to find and select the file name jobs.txt, which you should have saved in your file directory. If you have the file in your project folder, enter the filename instead. Click OK.
We want the format of this file to be CSV, so click Edit Source Options. In the Format field, select CSV, and then click OK.
Click Add Existing Metadata and select jobs.ddf. When you click OK, the Save specification message opens again. Click Yes.
Creating the Virtual (Combination) Records
Next, we need to define a pre-action layout (INREC section) to combine specific elements in the different sources, in this case, the JOB_HISTORY table and the jobs.txt file.
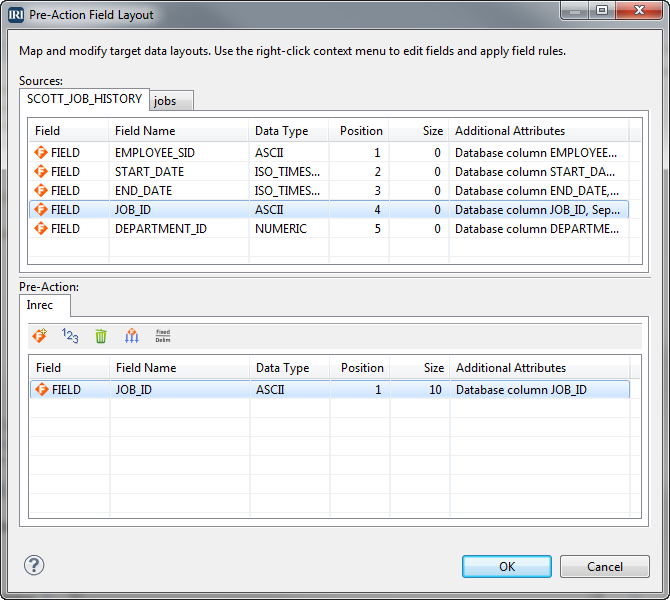
Click Pre-Action Layout on the Data Sources screen. On screen that opens, click Edit Pre-Action Layout. This opens the Pre-Action Field Layout editing screen.
In the Sources section at the top, select the jobs tab to show the fields in jobs.txt. Click the JOB_ID row and drag it to the Pre-Action section below.
Highlight that row by clicking it. Now click the Fixed/Delim icon![]() at the top of the Pre-Action section. In the Type field, select Fixed and click OK.
at the top of the Pre-Action section. In the Type field, select Fixed and click OK.
Click the value in the Size column and change it to 10. Click OK.

Back on the Pre-Action screen, click Next to move on to Data Targets.
Formatting the Target(s)
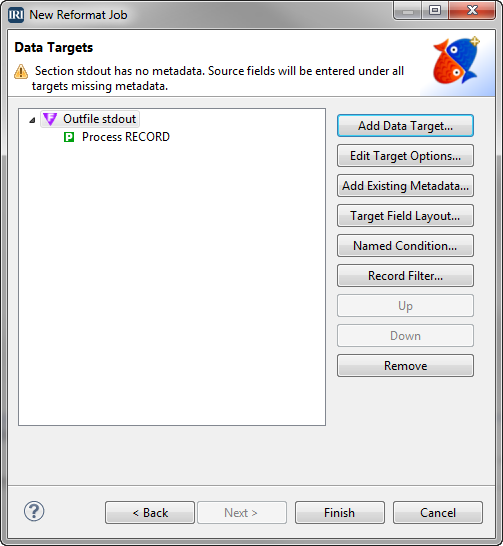
Click Add Data Target. Since federation typically combines data sources for an immediate view, select Standard out so that you can view the results in the console, and then click Ok.
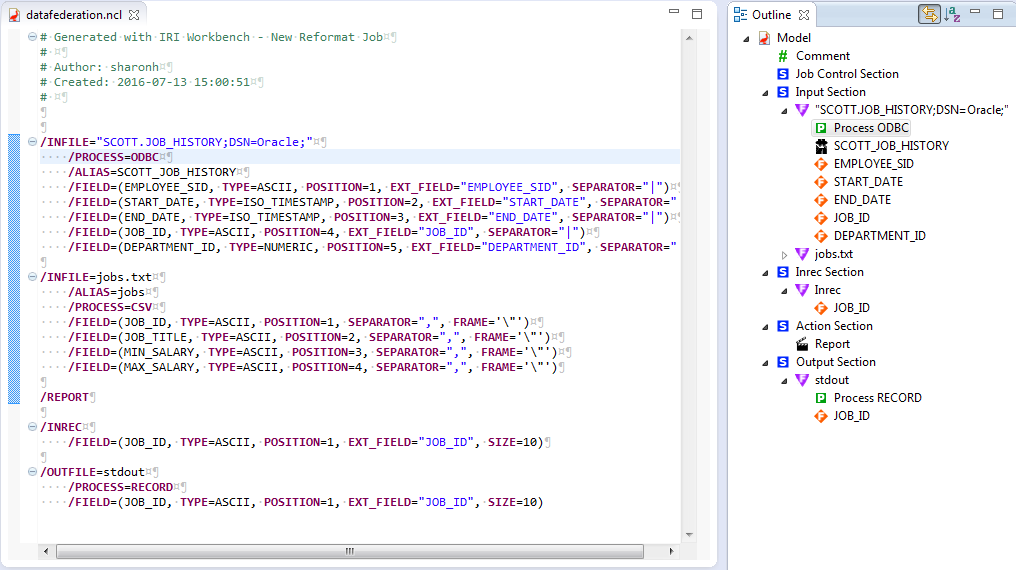
Back again on the Data Targets screen, click Finish to complete and open the underlying job script.
You can modify this script in the color-coded, syntax-aware editor directly, or by right-clicking in the script (or relevant portions of the outline) to open dialogs that expose the same parameters.
Seeing Results
Run the job script by right-clicking in the script and selecting Run As -> IRI Job.
View the job output in the Console window in the IRI Workbench.
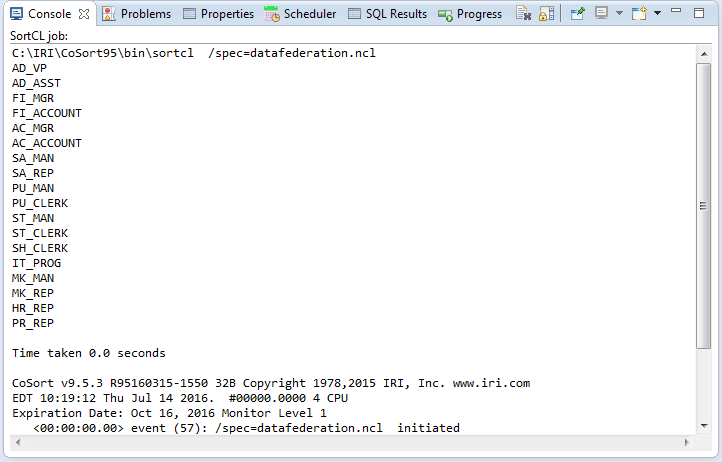
Note that only the field/column specified in the pre-action, JOB_ID, is included in the results. Neither of the original data sources were changed.
Contact nextform@iri.com if you would like help using this wizard, or are interested in using NextForm for data federation, migration, replication, or reporting generally.
- The free Lite edition of NextForm will perform many of these functions, though an upgrade to the DB edition or CoSort would be required for DB support and sort-driven transformations, respectively. All NextForm (and CoSort) jobs are also supported in IRI Voracity data management platform for data discovery, integration, migration, governance, and analytics.
