Generating Test Data for Azure DevOps
This is the third addition to our 4-article DevOps pipeline series. Here are the links to related DevOps articles for Jenkins, GitLab and AWS CodePipeline.
What is Being Demonstrated?
In this article I demonstrate how to use IRI Voracity TDM platform software from within an Azure DevOps pipeline to produce and use realistic test data in different sources for CI/CD purposes. Specifically, I run IRI RowGen scripts to synthesize test data in an Excel spreadsheet, and the DarkShield-Files API to mask PII from a CosmosDB NoSQL database. Note that I could just have easily invoked IRI FieldShield masking jobs for MS SQL from Azure DevOps too; see our first (GitLab) CI/CD article here.
Demonstration Prerequisites
- Your IRI software is installed and licensed on the target remote server (the remote server that the pipeline will access via SSH, which could be your on-premise computer or somewhere in the cloud).
- An Azure account with a CosmosDB database.
- If you are a new user and have a free tier account with Azure, you must have been approved for a free grant to use your pipeline.
About Azure Pipelines
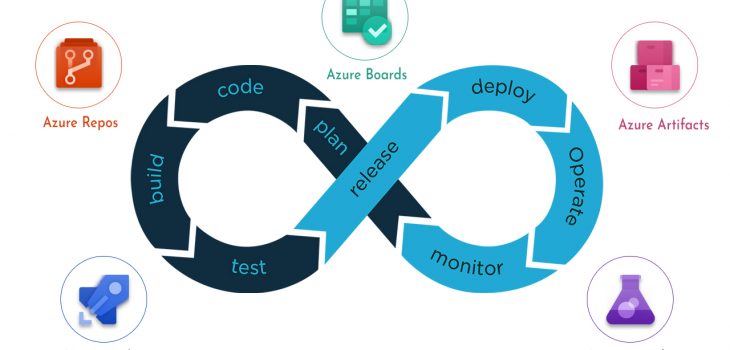
Azure Pipelines is a set of automated processes for building, testing, and deploying projects. The automation of these processes is meant to support the continuous integration, continuous delivery, and continuous testing methodologies of DevOps.
Continuous testing is a concept in DevOps that supports the testing of software at every stage of the software development life cycle.
Test Data Management and DevOps
What is Test Data Management (TDM). TDM is the process by which production-like test data is generated and made available to various tests so that the testing process has access to realistic data. An effective TDM strategy is beneficial for several reasons.
For one, unrealistic test data does not lead to more confidence in an application, and may lead to unfruitful testing. As such, a production-like test environment with production-like test data is necessary for accurately assessing how an application will behave during production.
Second, TDM is meant to guarantee the availability of test data when it is needed during tests. Good test data does not provide any benefits if it is not available at the time of test execution.
Tests in DevOps and the Role of Test Data
Test Data Management should be implemented to support various tests with realistic, good quality data throughout the DevOps process. Sauce Labs, an American cloud-hosted web and mobile application automated testing platform company, listed five functional tests that their most successful customers implement throughout the different phases of their DevOps pipelines.
These tests are:
- Unit testing – Individual units of source code are tested
- Integration testing – Ensures that build continues to be stable as new code is added
- Automated end-to-end and regression testing – Ensures application works in an environment like the production environment
- Production testing – Testing after application release to identify issues early
- Exploratory and live testing – Automated testing is replaced by manual or interactive testing that strives to produce unexpected errors.
And according to testingexperts.com, there are even a few more types:
Automated end-to-end/regression testing, production testing, and exploratory/live testing all benefit from effective Test Data Management (TDM):
End-to-end and regression testing can cover a very large range of test cases. As such, creating consistent test data that looks and acts like production data gives confidence that new changes have not introduced new problems for old code.
Production testing ensures that an application will work, and perform, as expected when moved to a production environment. Performance testing is an umbrella term for load testing and stress testing. Both require a significant amount of test data, so automating rapid, high volume synthesis via RowGen in Voracity for example, can greatly reduce time-to-availability here.
In exploratory and live testing, or “black box” testing, QA will look for unexpected behavior and bugs. High quality, realistic test data is the best way to test application behavior of course.
IRI Voracity Software and Test Data Management
Having confidence that an application will work, but being shocked when an unthought of bug occurs in production is never pleasant. Maybe data for a field was a little longer than expected.
That said, test environments usually lack the same level of security as a production environment. As a result, production data cannot be used as-is for testing.
A decision must therefore be made between using a copy of sanitized (masked) production data, or synthesizing test data that is as realistic as possible. Fortunately, IRI has several fit-for-purpose software solutions to offer here.
First, for synthetic data generation there is RowGen. This product creates and loads brand new synthetic, but realistic, test data targets in flat file formats and relational database (RDB) tables.
Second, for finding and masking PII and other sensitive data in flat files and RDBs, there is the IRI FieldShield product. For semi- and unstructured data formats, see the DarkShield product.
For this demonstration I will use the Azure DevOps pipeline to run RowGen scripts that will populate an Excel sheet with test data. In addition to RowGen, I will also use the DarkShield-API to read a container in CosmosDB and create a second container that contains the copied content after it has been sanitized of any PII.
As demonstrated in my previous articles on DevOps pipelines, any IRI job script that can run on the command line can be run from the pipeline via SSH. This article shows you how to set up SSH tasks and run IRI job scripts on remote machines in the Azure Pipeline.
The Structure and Setup of an Azure DevOps Pipeline
The structure of the Azure pipeline is divided into one or more stages. Each of these stages consists of one or more jobs that perform work. The jobs in each stage contain a step or steps that will have tasks, scripts, or references to external templates.
To set up a pipeline, you must first create a project and specify it as a public or private project. Azure will not allow you to execute any pipeline unless you are a paying customer or unless they grant you approval in their free tier to run your pipeline for free.
Azure staff currently requires up to three business days to evaluate a request and they call it “granting the right to use parallelism”. Parallelism is the ability to run two or more jobs simultaneously.
This seems somewhat misleading at the time of this writing however, because it doesn’t actually matter whether you try to run a single job or two jobs at the same time in your pipeline. You still cannot use the pipeline you made without first being granted approval for parallelism.
If you are a paying customer there is no three-day wait. At the discretion of the Azure support staff, you may also be required to run your pipeline as a private project for it to be approved.
After creating a project, you can then create a pipeline. When creating a pipeline you will be prompted to fill out configuration details, including the repository for your source code to reside.
 Azure DevOps prompt for you to create a Pipeline
Below are the steps to creating your first pipeline.
 Select the version control system you are using that will be the location of your application source code and that the Azure DevOps pipeline will draw from during the Build stage.
 Select the repository your pipeline will use
 Choose a starter pipeline, or a pre-existing pipeline
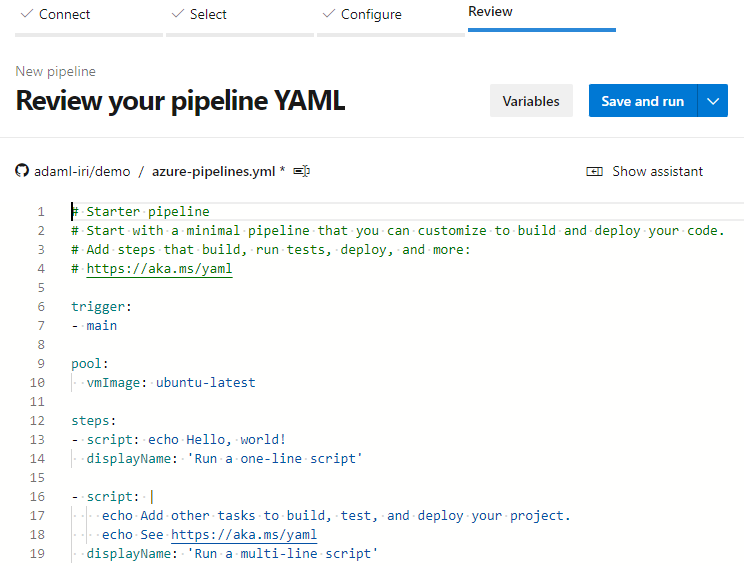 Review the created pipeline and then Save and Run.
Setting Up a Service Connection
To generate test data via the pipeline, an SSH task will be added that will perform the process of connecting to a remote machine that contains a licensed copy of IRI Voracity or a component product like FieldShield, DarkShield or RowGen. But before we continue any further we need to set up an SSH service connection. To do that:
- Open Project Setting at bottom left corner of the screen
- Select Service connections
- Click New Service Connection
- Select SSH and click Next
- Fill out the service connection form and save.
 Navigating to Service Connections from Project Settings
 Creating a New Service Connection
 Selecting the SSH Service Connection
 Configuring the SSH Service Connection
 New SSH Service Connection is displayed.
If you followed all of the steps, you have a service connection set up for when you configure the SSH task.
What Are Release Pipelines and How Are They Set Up?
Understanding what a release pipeline is can be a bit difficult for those who first learned with multi-stage pipelines like in the case of GitLab CI/CD pipeline. The multi-stage pipeline will have a build stage and a deploy stage.
Azure DevOps instead has more than one type of pipeline. There are build pipelines and release pipelines. The build pipeline will build and create your project artifact.
The release pipeline gets triggered by the build artifact and deploys the artifact to one or several stages. As Dhimate describes it, “A release pipeline is a conceptual process by which we take committed code into production”1.
In this demonstration a release pipeline will contain the SSH task that will perform the process of connecting to a remote server.
 In the left panel, under the Pipelines section select Releases.
 Select New pipeline to create a new release pipeline.
 Select Empty Job for the template of the release pipeline.
 Click Save to finish creating a release pipeline.
After a new release is created, we can then start adding tasks.
Creating an SSH Task
After connecting, a command will be executed to run an IRI RowGen job script to synthesize safe, realistic test data sent to an Excel sheet. Afterward, a second command will be executed to make a DarkShield-Files API call to CosmosDB where test data will be generated from masking production data.
To add the SSH task, follow the steps below:
 Click the blue link “1 job, 0 task” to edit the Agent Job and add tasks.
 Click the plus sign in the Agent job panel to add a task.
 In the Add tasks panel select SSH task template. To easily find SSH can use the search bar in the upper right corner.
After clicking on the SSH task template in the Add tasks panel, you will have an empty unconfigured SSH task under your Agent job.
Configuring the SSH Task
As stated previously, after adding the SSH task to the Agent job, it will be visible and listed in a panel under the Agent job panel below.
 Enter the commands to be executed during SSH connection.
If you click on the SSH task, it will display a check and open a configuration panel on the right like in the image above. Specify the SSH service connection that was created at the beginning of the walkthrough, and the commands you wish to execute on the remote machine.
Results of The Pipeline
After the SSH task is set up the release pipeline can be deployed. And, if everything was configured correctly the release pipeline will have finished successfully after establishing the SSH connection to the remote machine and executing the SSH commands.
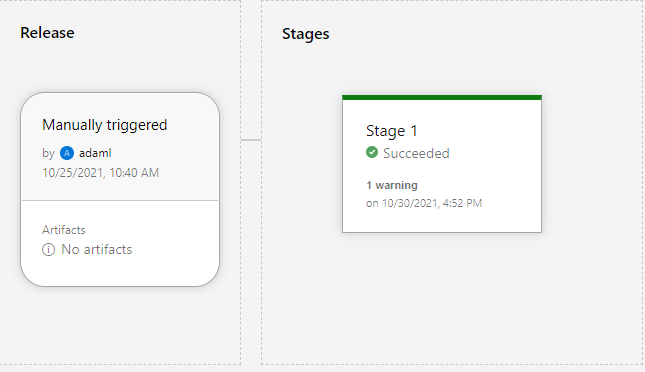 Successful pipeline execution.
The stage that contains our SSH task will have a log output that can be viewed:
 Agent Job output log for SSH task shows successful SSH connection and execution.
Results of SSH Execution
As a result of the successful execution of SSH commands, the remote target machine will run a batch file containing RowGen jobs. Below is one such RowGen task script, built automatically in the IRI Workbench GUI for RowGen:
For my test data, I used set files to randomly select and populate test data into my spreadsheet. Set files are ASCII value lists (containing like objects), with each value on a new line in the file.
After the job scripts are executed, the final result is an Excel spreadsheet populated with randomly generated test data. Though that target was an XLS file, it could have instead (or also) been other files or tables in an RDB like MS SQL, MySQL, PostgreSQL, DB2, or Oracle.
 Excel Sheet with RowGen-synthesized Test Data
After generating test data using RowGen, a second command is run to make an API call to the DarkShield-Files API. The calling program will read from a production container in CosmosDB, use the search and mask context of the API to sanitize the sensitive data, and write the masked results into a second container used for testing.
 Sample of an unprotected PII in an item
 Sample of the same item with the PII masked by DarkShield
In Closing
This article demonstrated how to automate the execution of IRI test-data-producing jobs from within an Azure DevOps Pipeline. Using SSH, any IRI job script or API routine that can run from the command line can be executed from within the pipeline.
This is because the IRI back-end engine is an executable, so products like DarkShield, FieldShield, and RowGen can run from the command line. The DarkShield-Files API can be programmatically assigned to execute on preselected data sources as our Python demos show.
Recently IRI has also created and published on Docker Hub, a docker image for the DarkShield API. Because the DevOps pipeline uses containers to set up environments, it is possible to utilize this container to run the DarkShield-Files API from within the pipeline.
- Dhimate, Gaurav. “Release Pipeline Using Azure Devops – Dzone Devops.” Dzone.com, DZone, 17 Feb. 2021, https://dzone.com/articles/release-pipeline-using-azure-devops.


