PII Masking in MongoDB (1st Method)
Editors Note: This example demonstrates our earliest, least direct (though still available) method of using IRI FieldShield for NoSQL database protection; i.e., for MongoDB data masking. As you will read, the MongoDB Export Utility in this case extracts data and create a CSV file that FieldShield masks externally, prior to loading the newly secured data back into MongoDB. You can use this same approach for data in other NoSQL databases like Cassandra and ElasticSearch.
IRI also offers more direct methods to move data between MongoDB collections and IRI data masking engines like FieldShield or Voracity. A how-to-article on direct data masking of structured MongoDB data through ODBC from 2016 is here, and through MongoDB’s native driver supported in CoSort v10 (powering FieldShield and Voracity) in 2018 is here. The latest method — which can also find and mask PII in both structured and unstructured MongoDB collections using IRI DarkShield — in the GUI since 2024 is here, and in the API since 2021 is here.
MongoDB is a powerful NoSQL database that can store large amounts of data in packets called collections (similar to tables in relational databases). Though it scales horizontally (add power to the database by adding machines), MongoDB has no internal way to mask data once it has been entered, other than manually updating each record.
The example below shows how to mask MongoDB values externally. I explain how to export a collection to a CSV file, use IRI FieldShield to mask a field in that file, and import that file back into Mongo so the collection is protected appropriately. Note that you can mask any number of fields 15 different ways using FieldShield.
It is also possible to automatically discover and mask data in multiple structured, semi-structured, unstructured sources on the bases of centrally defined data classes, which other articles in this blog (like this one) detail. This example only shows the masking aspects however, based on exported collections.
Data Before Masking
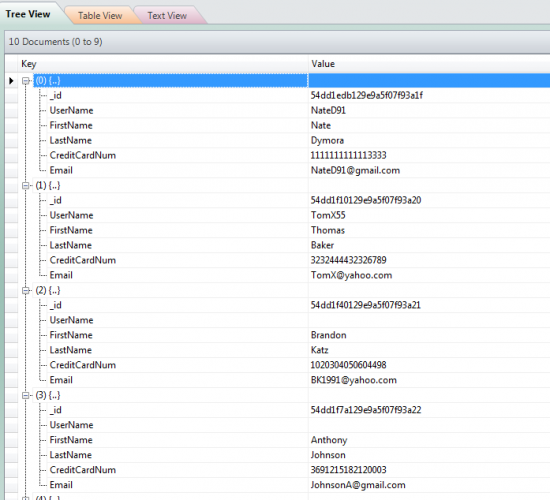
Here are the records in the source table, shown with MongoVUE.
Exporting the Table Data
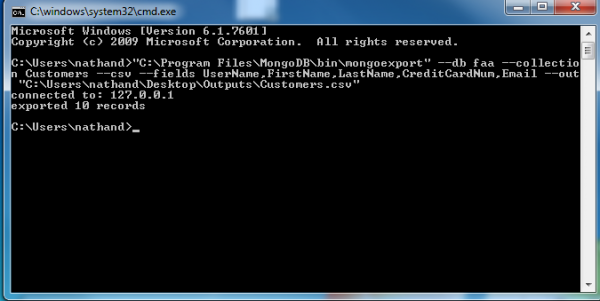
Use the MongoDB Export utility (mongoexport) to run the command:
--db <Database Name> --collection <Collection Name> --csv --fields <field1,field2,...> --out <Output Path>
Using the FieldShield GUI to Create the Data Masking Job
- Open the IRI Workbench and start the Create New Protection (Masking) Job wizard for FieldShield.
- Choose whatever name you would like to give the job, and click next.
- On the Data Sources screen click Add Data Source and locate the CSV file you created.
- Click Edit Source Options and, under Options, change the Format type to CSV and click OK.
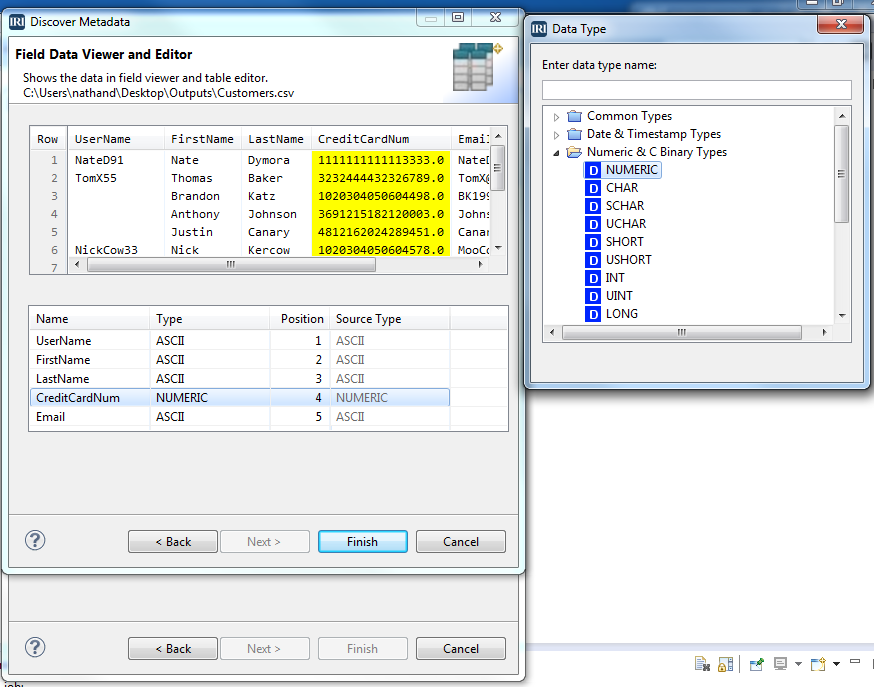
- Click Discover Metadata and follow through the wizard. It should detect the seperator as ‘,’ and be able to generate the field data. It will most likely pick ASCII for the data type. To change this, click the field data type you wish to change and then select the data type you wish to use. Once you are happy with your data types, click Finish.
- Click Next to get to the Data Targets screen, and click on Add Data Target. Then name a CSV file you want to create, and click OK.
- Click Target Field Layout to bring up the screen where you will apply the mask:
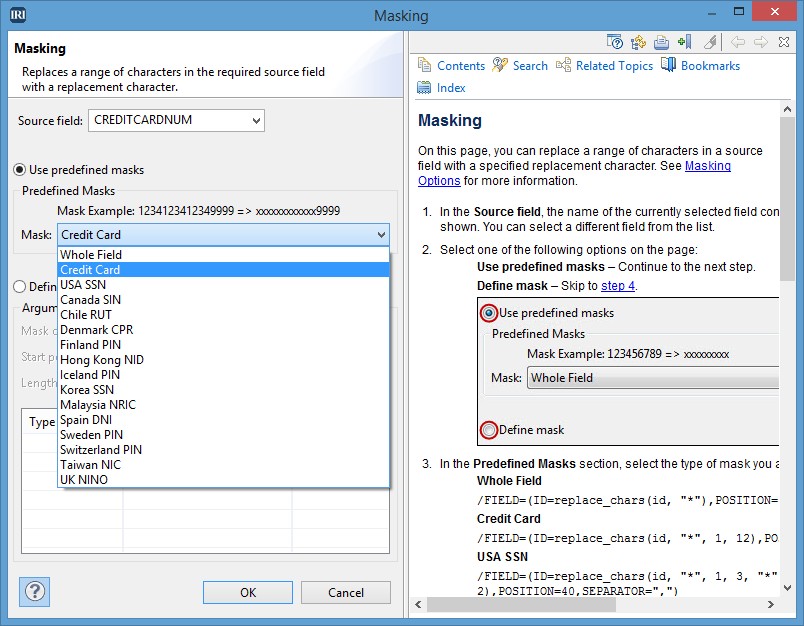
- The bottom table will show you all the fields that will be in your target file. Select the field name you want to mask, click the Field Protection menu arrow, and choose the desired masking function from the drop-down box.
- Complete the dialog’s parameters, click OK (twice) and Finish to complete the job wizard.
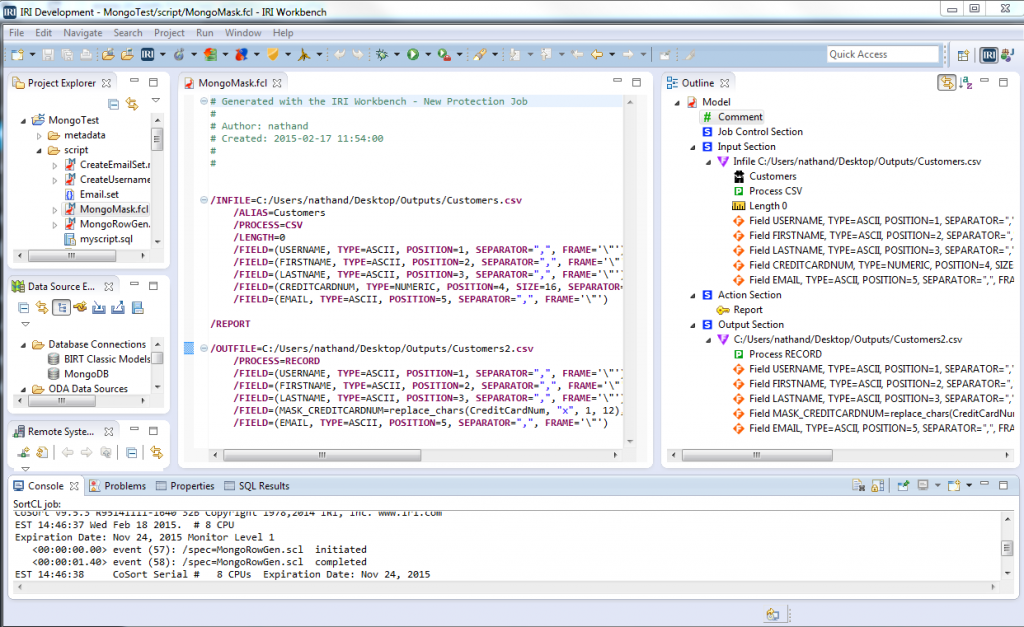
- Your FieldShield job should then be generated for you:
Review, and if necessary, modify and re-save your data masking job. Run it from the GUI, the command line, or from within an application to generate the file you will upload back into MongoDB.
Importing the Masked Table
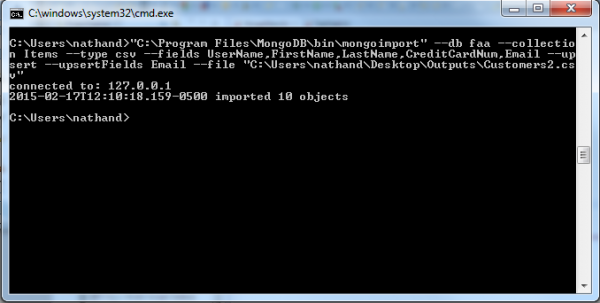
Use the MongoDB Import utility (mongoimport) to run the commands:
--db <Database Name> --collection <Collection Name> --type csv --fields <field1,field2,...> --upsert --upsertFields <Field to match to old database*> --file <File Path of the file to import (The file created by the Mask Script)>
*To import everything back into the old collection, you must tell it which of the fields you are inputting to query against the existing records. An example would be email; it would match all of the importing records against their existing email, and update the record.
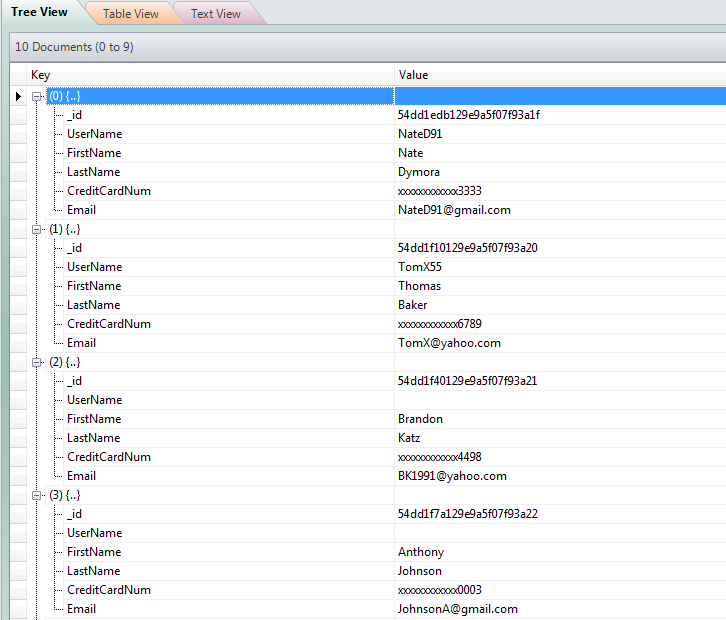
Data After Masking
Below are the records in the target table; shown with MongoVUE. Note that only the credit card numbers were redacted in the FieldShield process; other fields could have been protected with similar or different functions at the same time.
In addition to the relatively easy definition and execution of FieldShield jobs, there are other advantages to using it with Mongo, including:
- speed in volume — both IRI and Mongo’s performance architectures are designed to scale linearly
- cross-platform compatibility — choose from these supported sources
- simultaneous data integration, migration, replication, federation, and reporting capabilities in the same CoSort (SortCL program, FieldShield’s parent) job script and I/O pass
Contact fieldshield@iri.com if you have any questions about this process or comment below.



1 COMMENT
[…] IRI customers can manipulate MongoDB collections. The first is via flat files as described in 2014 here. The second is with ODBC and JDBC drivers described in 2016 […]